1. Introduction to Epoxy Flooring
What is Epoxy Flooring?
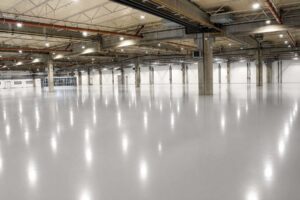
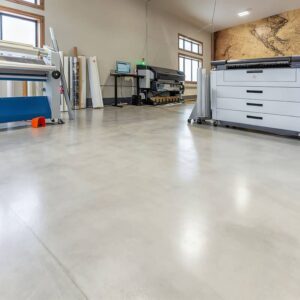
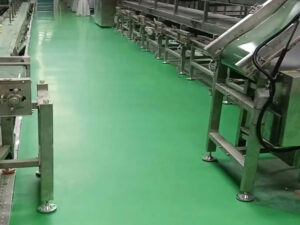
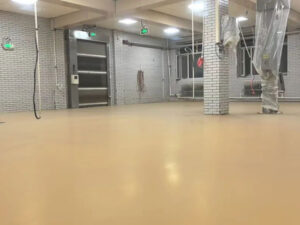
Epoxy flooring is a durable, high-performance coating made by mixing epoxy resin with a hardening agent. It’s widely used in garages, warehouses, factories, and commercial spaces due to its exceptional durability, chemical resistance, and glossy finish.
Why Choose Epoxy Flooring?
- Extreme Durability – Resists heavy machinery and vehicle traffic.
- Chemical & Stain Resistance – Protects against oil, acids, and moisture.
- Easy to Clean – Smooth, seamless surface prevents dirt buildup.
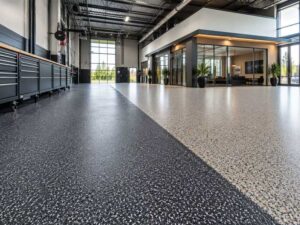
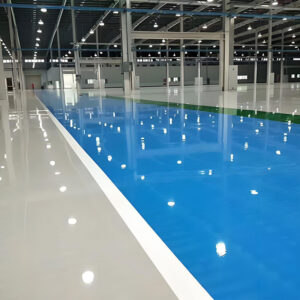
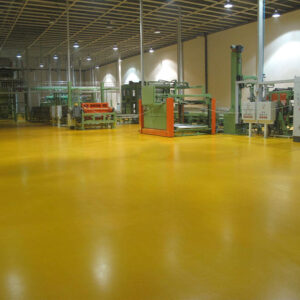
- Aesthetic Appeal – Customizable colors, metallic effects, and decorative flakes.
Where is Epoxy Flooring Used?
- Garage Floors – Resists oil stains and impacts.
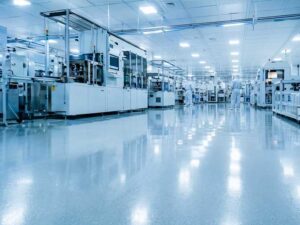
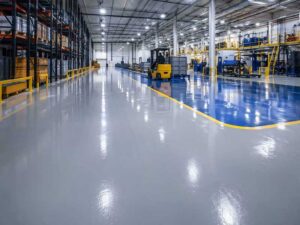
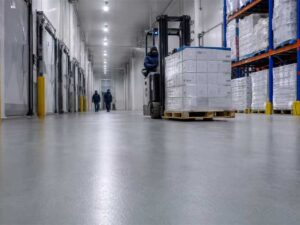
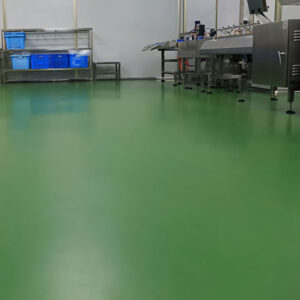
- Industrial Facilities – Handles heavy equipment and forklifts.
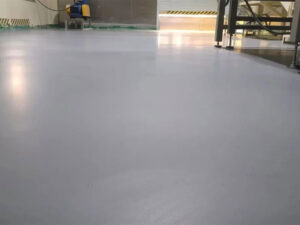
- Warehouses – Provides a dust-proof, easy-to-maintain surface.
- Retail & Showrooms – Enhances visual appeal with high-gloss finishes.
2. Pre-Installation Checklist
Tools & Materials Needed
| Item | Purpose |
|---|---|
| Epoxy coating kit (primer, base coat, topcoat) | Main flooring material |
| Hardener | Activates the epoxy resin |
| Concrete grinder/etching solution | Prepares the surface |
| Vacuum/broom | Cleans dust and debris |
| Paint roller/squeegee | Applies epoxy evenly |
| Safety gear (gloves, mask) | Protects during application |
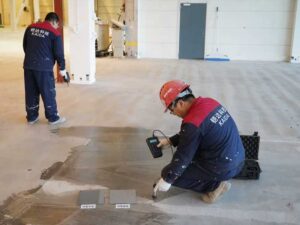
Surface Preparation (Most Important Step!)
① Clean the Floor Thoroughly
- Remove oil, grease, and old coatings (if any).
- Use a degreaser and pressure washer for deep cleaning.
② Repair Cracks & Imperfections
- Fill cracks with epoxy filler or cement patching compound.
- Grind down uneven areas for a smooth base.
③ Etch or Grind the Concrete
- Acid Etching: Apply diluted muriatic acid (follow safety guidelines), scrub, then rinse.
- Mechanical Grinding: Use a diamond grinder for better adhesion.
3. Step-by-Step Epoxy Flooring Application
Step 1: Apply the Epoxy Primer
- Purpose: Ensures strong bonding with concrete.
- How to Apply:
- Mix primer and hardener as directed.
- Roll evenly onto the floor, avoiding puddles.
- Let dry for 8-12 hours (depending on humidity).
Step 2: Apply the Base Coat (Optional for Thickness)
- When Needed: For uneven surfaces or extra durability.
- Application Tips:
- Mix epoxy base coat and add quartz sand for strength.
- Spread with a squeegee for uniform thickness.
- Sand lightly after curing to remove imperfections.
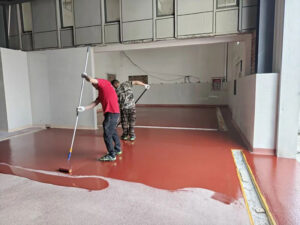
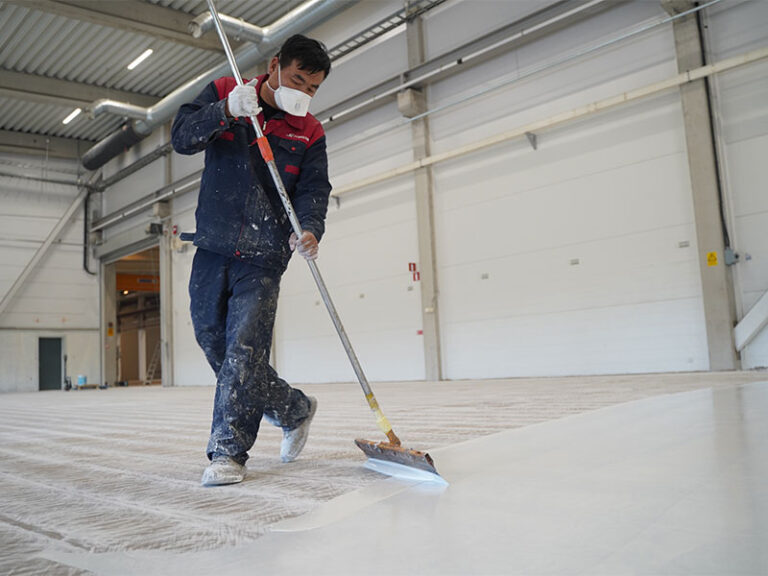
Step 3: Install the Epoxy Topcoat
- Options: Self-leveling epoxy or roll-on topcoat.
- Best Practices:
- Mix topcoat and hardener slowly to avoid bubbles.
- Use a high-quality roller for smooth application.
- Add decorative flakes or metallic pigments (optional).
Step 4: Curing & Final Care
- Drying Time:
- Walkable in 6-8 hours.
- Fully cured in 7 days (vehicle-ready).
- Maintenance Tips:
- Avoid water/chemical exposure in the first week.
- Reapply a clear topcoat every few years for longevity.
4. Pro Tips for a Perfect Epoxy Floor
① Control Temperature & Humidity
- Ideal conditions: 60-80°F (15-25°C), humidity below 85%.
② Avoid Common Mistakes
- Poor Mixing → Uneven curing.
- Rushing Drying Time → Weak adhesion.
- Skipping Prep Work → Peeling/flaking later.
③ How to Make Epoxy Flooring Last Longer
- Use mats under heavy equipment.
- Clean with pH-neutral cleaners.
5. Frequently Asked Questions (FAQ)
Q1: Can I Apply Epoxy Flooring Myself?
✅ Yes, but follow instructions carefully—start with a small area first.
Q2: How Long Does Epoxy Flooring Last?
⏳ 10-15 years, depending on maintenance.
Q3: Can You Apply Epoxy Over Old Flooring?
⚠️ No, proper surface prep is mandatory for adhesion.
Q4: What is Fluid Applied Flooring?
Fluid Applied Flooring refers to seamless flooring systems where liquid materials (epoxy, polyurethane, or MMA) are poured or coated onto a surface, then cured to form a durable, monolithic layer. Key features include:
- No seams (ideal for hygienic or high-traffic areas).
- Chemical & abrasion resistance (common in factories, garages).
- Fast installation (some types cure in 2–4 hours).
- Customizable (colors, textures, anti-slip additives).
Best for: Industrial facilities, hospitals, commercial spaces, and garages.
Q5: How to Apply Epoxy Flake Flooring?
Step-by-Step Guide:
- Prep the Floor:
- Clean thoroughly (degrease, etch concrete).
- Repair cracks/holes with epoxy filler.
- Apply Base Coat:
- Roll on 100% solids epoxy (evenly cover the surface).
- Broadcast Flakes:
- Immediately sprinkle colored flakes (by hand or mechanical spreader) at 0.5–1 lb/sq ft.
- Clear Topcoat:
- After 12–24 hours, apply polyurethane/polyaspartic topcoat for protection.
- Cure: Wait 24+ hours before light use; 7 days for heavy traffic.
Pro Tip: For a denser flake look, apply a second epoxy coat before topping.
Q6: Can You Apply Epoxy Over Paint?
Yes, but only if:
✅ The paint is fully adhered (no peeling).
✅ It’s acrylic or epoxy-based paint (oil-based paint may reject epoxy).
✅ You properly prep the surface:
- Scuff-sand the paint (for adhesion).
- Clean with TSP or degreaser.
- Test adhesion (tape pull test).
Warning: Avoid applying epoxy over latex paint—it’s too flexible and may delaminate.
Q7: How Long Does Epoxy Flake Flooring Last?
Residential (garages): 10–15 years with proper maintenance.
Commercial/Industrial: 5–10 years (higher wear).
Extend lifespan by:
Using UV-resistant topcoats (for outdoor/sun-exposed areas).
Avoiding harsh chemicals (use pH-neutral cleaners).
Reapplying topcoat every 3–5 years.
6. Conclusion
Learning how to apply epoxy flooring correctly ensures a long-lasting, professional finish. Key takeaways:
- Prep work is critical—clean, repair, and etch the floor.
- Apply coats evenly—avoid bubbles and streaks.
- Allow proper curing—don’t rush the drying process.
For large-scale projects, consider hiring an epoxy flooring professional.