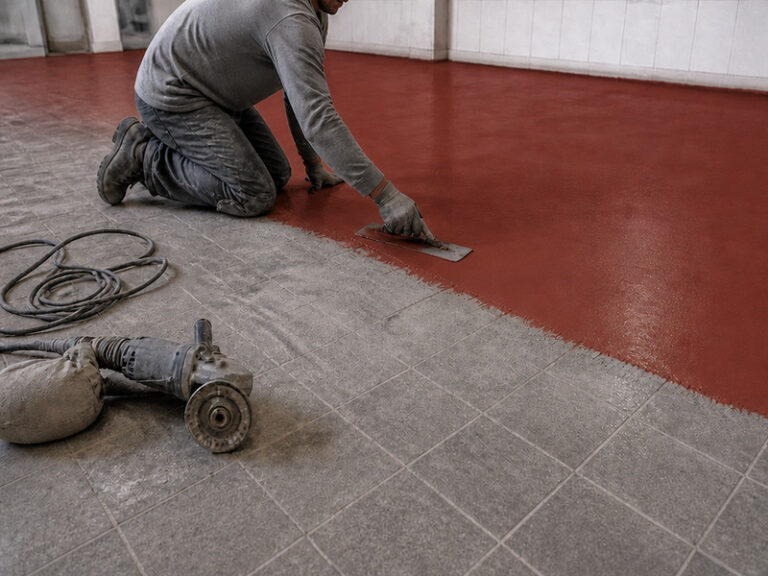
Urethane cement over tile is a legitimate renovation route, and it removes the demolition, the skips and the days of noise that a tile strip-out involves.
A urethane cement over tile renovation therefore has two jobs: to bond to what is there, and to avoid inheriting a failure that is already present. The second job is the harder one.
An overcoat over tile is also the route most likely to fail, because a tiled floor is a set of small rigid plates on a bed that may already be debonding.
This article sets out which tiles can stay, how to treat the joints and the adhesive, and the single test that decides whether the whole approach is viable.
The short answer
Sound, well-bonded tiles can be overcoated with urethane cement at 4 to 6 mm, provided the surface is mechanically keyed, the joints are filled and a pull-off test passes.
A urethane cement over tile system also has to manage movement. The tile bed and the slab beneath it can move differently, and the new floor sits across both.
Loose, drummy or hollow tiles must come out. A floor that is already failing will transfer that failure to the new layer within a season.
The build-up height is the hidden cost, because the new floor adds 4 to 9 mm to the existing level, and thickness selection is what decides where in that range the job lands. Anyone specifying a urethane cement over tile floor should walk the doorways first, because the height problem is visible there rather than in the middle of the room.
The pull-off test is not optional. It is the difference between a renovation and a repeat.
Table 1: Substrate condition and the treatment it needs.
| Condición | Treatment |
|---|---|
| Sound, bonded tile | Key, fill joints, prime |
| Hollow or drummy tile | Remove and patch |
| Cracked tile | Remove and patch |
| Cement adhesive residue | Grind flat, prime |
| Dispersion adhesive | Remove completely |
| Contaminated surface | Degrease before keying |
A tile is dense, hard and chemically inert, which makes it an excellent surface for a resin to sit on once it is keyed.
That inertness is also the reason tile preparation is mostly mechanical. No primer will key to a glazed tile, and no acid will etch one usefully.
The problem is what lies beneath. Tiles are fixed to a bed, the bed is fixed to a slab, and there are two interfaces that can fail independently.
A hollow tile is also the reason a survey must be done on hands and knees with a hammer. From standing height, a failing floor looks identical to a sound one.
Work to a one meter grid, mark every hollow tile on a plan of the room, and add up the area they cover. A hollow tile found at the keying stage costs a repair. The same tile found after the body is placed costs a cut-out. That share is the number the decision turns on: a small share is a series of local repairs, a large share is a strip-out, and the crossover is decided by comparing repair cost against the demolition rate for the room. Without the plan, the same conversation happens twice, once at tender and once at handover, with different numbers.
A tile that sounds hollow has already debonded, and no coating will hold it down.
A urethane cement over tile floor is only as good as the weakest tile beneath it. One hollow tile in a traffic lane is enough to start a debond that spreads.
The survey matters more than the product on this type of project, and why a visual inspection is never enough.
Tile preparation: the first four steps of the main sequence
Step 1 is degreasing. Grease, wax, polish and old sealer all have to be removed before anything mechanical happens, because a grinder will burn contamination into the surface rather than lift it.
Step 2 is the initial survey and the removal of tiles already known to be hollow. A tile that is loose, hollow or cracked comes out and is patched with a mortar compatible with the primer, because a floor placed over a failing tile inherits the failure.
Step 3 is keying, and keying is the second survey. Breaking the glaze on a ceramic tile gives a coating a profile to bond to, and the same pass reveals the tiles the tapping missed, because a tile that lifts or chips under the grinder was already loose.
Step 4 is the second repair and the joint preparation. The new patches are leveled flush, and the joints are cleaned out to a depth that lets them be filled rather than bridged. A filled joint also changes how the body is placed over it, which is covered under application methods. Tile preparation is the part of the program a cheap quote compresses first. This is where most of the labor in tile preparation sits. A 300 square meter kitchen can take a day of joint work, and it is the item most often left out of a low bid.
Cleaning a grout line is slow work with a hand tool, and it decides whether the finished floor shows a grid under low light. A grout line cleaned to depth takes a filler without voids. Skipping Step 1 is the most common cause of a floor that lifts in sheets, and skipping Step 3 is the most common cause of a bond that fails at the first washdown.
Grout lines: fill them, do not bridge them
A grout line is a recess, and the only workable treatment of a grout line is to fill it flush before the floor goes down. Bridging a joint with a thin coating leaves an air pocket that expands and contracts and eventually debonds, and the arithmetic of the two treatments is in the table below.
Table 2: The same 4 mm specification over a 3 mm recess, two ways.
| Treatment | Thickness there | Void | Risk | Acceptable |
|---|---|---|---|---|
| Recess left open | 4 mm spanning a gap | 3 mm pocket | Thin edges, then debonding | No |
| Recess filled flush | 7 mm in total | None | None beyond the body | Sí |
A missing tile or a patched area that sits 2 mm low follows the same rule: the new floor has to be supported everywhere, or it will flex where it is not.
The filler also has to be compatible with the primer. A cementitious filler is usually safe; a silicone or an acrylic is not, and it will reject the coating.
Where the joint is wide, a filler with some flexibility is safer than a rigid one, because tiles move.
A grout line that is filled and leveled is the difference between a smooth floor and a floor with a visible grid under grazing light.
Table 3: Tests and what each one proves.
| Test | Proves |
|---|---|
| Tap survey | Which tiles are hollow |
| Solvent test on adhesive | Thermoplastic or cementitious |
| Moisture reading | Whether the bed is dry |
| Pull-off on a patch | Whether the system holds |
Before the main area is touched, prepare one square meter exactly as the full job would be: key it, fill the joints, prime it, coat it, cure it and pull a dolly.
That test patch is also where the crew learns how the tile bed behaves under a trowel. Some beds are hard and sound; others move under a trowel and warn you before the main area.
A pull-off test on that patch is the only evidence that the system will hold, and the bond test is the one item no supplier can waive.
Read the result with the method attached: a 50 mm dolly, a steady load, a bond value of at least 1.5 MPa, and the failure inside the tile or the bed rather than at the interface. The data sheet fields that carry those conditions are the only way the number travels to another project. That figure is our acceptance threshold rather than a value taken from a standard, and the method has to be written beside it or it means nothing.
Where the pull-off passes but the tile bed is uneven, the debonding risk moves to the high spots. Where the test fails, the answer is usually removal rather than a different primer.
A failed bond test on a tile floor is the cheapest information a buyer will buy on the project. It also costs a morning rather than a week of demolition.
Debonding risk is high enough on this type of renovation that the test pays for itself on the first project, and a urethane cement over tile quote without it is a quote with an unknown in it.
Debonding risk in any overcoat falls sharply when the survey, the keying and the pull-off test are all done, and rises sharply when any one of them is skipped. The signs appear within the first year, and each one points at a different omission.
A hollow note under a tap, usually at a doorway or around a drain, points to a hollow tile that the survey missed. Tap the area again and map it before anything else is done.
A hairline crack that follows a joint line points to movement in the tile bed that was never given a joint of its own. Check whether a movement joint exists at that line.
A lift at the perimeter points to edge detailing or to shrinkage rather than to the tile. Check the primer coverage and the curing conditions at the edge.
Height build-up and thresholds
A resin floor over tile adds its own thickness plus any leveling, and that height has to go somewhere.
Where the threshold cannot be raised, the height build-up becomes the deciding constraint. That is the point at which a strip-out sometimes becomes cheaper than an overcoat.
At a doorway the new level meets a frame, a threshold strip or another floor, and the detail has to be designed rather than improvised.
At a drain the new floor sits above the old grating unless the drain is raised, and a raised drain is a trip hazard unless it is ramped.
Table 4: Height build-up by approach.
| Approach | Added height | Nota |
|---|---|---|
| Direct overcoat, 4 mm | 4-5 mm | Joints filled flush |
| Overcoat with leveling, 6 mm | 7-9 mm | Uneven tile bed |
| Overcoat plus screed | 15 mm or more | Rarely economical |
| Strip-out and rebuild | Matches original | Adds demolition time |
That cost belongs in the comparison with demolition, and it is usually the number that decides.
Existing adhesive and how it behaves
Testing the existing adhesive takes five minutes and a rag, and the test is worth more than the product data. A solvent that softens the residue is the clearest warning that the adhesive cannot stay.
Tile adhesive is either cement-based or dispersion-based, and the two behave differently under a new floor.
That distinction matters most on a partial removal. A floor where half the tiles come out can leave two different adhesives side by side, and each needs its own treatment.
A cement-based adhesive is stable once it has cured and keyed, and it can be left in place where tiles are removed.
A dispersion adhesive is thermoplastic. It softens under heat and under some solvents, and it must be removed completely.
Where the existing adhesive is unknown, a solvent test on a small area will show whether it softens.
Leaving a thermoplastic adhesive under a new floor is a debonding risk that no primer addresses. Existing adhesive of that type is the single most common reason an overcoat lifts in sheets.
Mechanical keying without demolition
Mechanical keying is diamond grinding or light blasting, and mechanical keying is what opens a glazed tile so that a primer has something to hold.
The same pass removes the old surface contamination, which is why keying and cleaning are never separated in practice.
Grinding removes the glaze and opens the surface, and it also reveals which tiles are loose because they lift or chip. Where access is tight, a hand grinder with a diamond cup does the same work at a fraction of the rate, and it is the realistic option for a small kitchen.
Blasting is faster on a large area and produces a more uniform profile, and it is noisier and dustier. Mechanical keying by either method is the step that cannot be skipped, whatever the primer claims.
Either method leaves a surface that must be vacuumed before priming.
The keying step is also the survey step, because it exposes the tiles that the visual inspection missed. Mechanical keying is the only step in the job that both prepares the surface and inspects it.
Sequence, noise and program
The renovation sequence runs survey, removal of the tiles already known to be hollow, keying, repair of whatever the keying reveals, joint filling, priming, body and seal, with curing between the last three. The repair happens twice because keying is also a survey step, and each stage has a hold point that the next one depends on.
Noise is confined to the keying stage, which is usually one or two days rather than the week a strip-out takes.
Dust is the other consideration, and a tiled floor produces fine dust when ground, which needs extraction rather than sweeping.
A urethane cement over tile floor needs the survey more than it needs the extra day of grinding.
The program advantage is real: a small kitchen can be overcoated in a weekend where a strip-out would take a week.
That advantage is the main reason clients ask for this route, and it is worth protecting by not compressing the survey. A two-day survey on a 300 square meter kitchen is not unusual, and it is the cheapest day on the job.
Specifying a tile renovation
State the survey method, the bond test, the joint treatment and the build.
State what happens if a hollow tile is found after the floor is placed, because that contingency needs an owner. The usual answer is a local repair in the same material, cut back to a sound tile and re-laid, and it is a small job when it is planned rather than discovered at handover.
State the threshold and drain details, since those are where the height build-up becomes visible.
State the adhesive type if it is known, and require removal where it is thermoplastic.
The bond test result belongs in the handover file, with the dolly size and the failure mode on the same sheet. A specification written this way protects both parties, and it also makes the comparison with demolition honest.
What we would not do
Four jobs are not renovations, and saying so before the order costs less than discovering it afterwards. Each one shows up either in the survey or in the pull-off, which is why both come before a price.
Table 5: Four jobs the material cannot rescue, and what to do instead.
| The case | Why it fails | Instead |
|---|---|---|
| Widespread hollow tiles | The bed is already failing under every one | Strip out and rebuild |
| A wet bed | No bond forms over a damp interface | Moisture reading and a drying period |
| An active movement joint | The new floor will crack on the same line | Carry the joint detail through |
| A badly uneven bed | The body cannot correct 20 mm of drift | A leveling layer before the body |
A proper survey is the shared precondition for all four rather than a substitute for any of them, and it is the item that turns a conversation about risk into a priced decision.
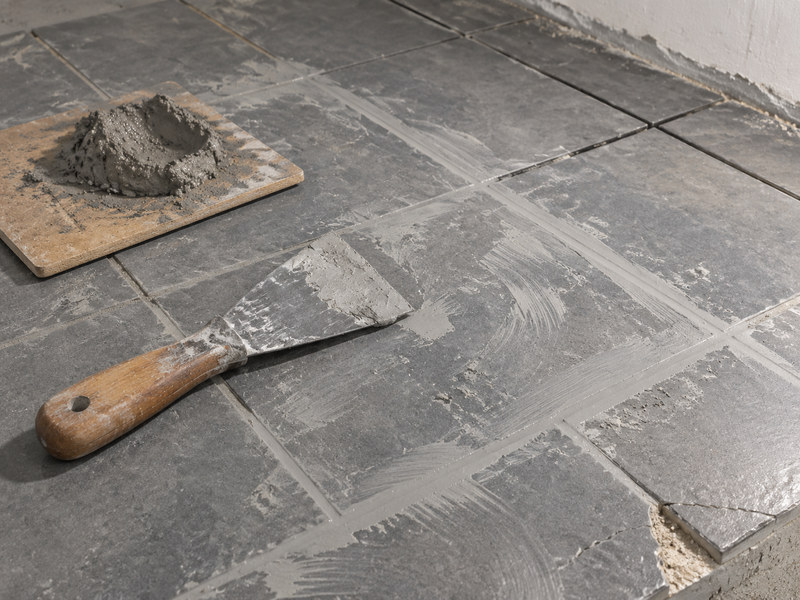
Figure 1: a filled joint is a continuous base; a bridged one is an air pocket.
Frequently asked questions
Can you put urethane cement over tiles?
Yes, where the tiles are sound and bonded, the surface is keyed, the joints are filled and a bond test passes.
Do the tiles have to be removed?
Only the hollow, cracked or loose ones. A floor with widespread drummy tiles should be stripped rather than covered.
How do you prepare tiles for a resin floor?
Degrease, then diamond grind or lightly blast to break the glaze, then fill the joints flush before priming.
What about the grout lines?
They are filled, not bridged. A floor placed over an open joint leaves a void that will debond.
How much height does it add?
Four to five millimeters for a direct overcoat, and up to nine where a leveling layer is needed.
What if the old adhesive is still there?
Cement-based adhesive can be ground flat and left. Dispersion adhesive must be removed, because it softens with heat and solvent.
How long does the renovation take?
A small kitchen can be overcoated over a weekend. The keying stage is the noisy part, and it is usually one or two days.
Working with Kaida Paint
Kaida Paint supplies urethane cement for overcoating work and will test a patch on your tile floor before quoting the area. Send photographs, the tile type and the drain and threshold details, and we will say whether the renovation route is viable or whether the floor should come out.


 English
 Spanish
 Portuguese
 Arabic
 French
 Italian
 Russian
 Indonesian
 Swedish