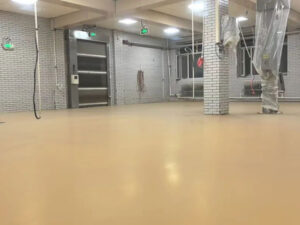
The immediate fix for peeling or delaminating polyurethane flooring is to remove all loose and compromised finish, properly prepare the underlying surface through sanding and cleaning, and apply new, thin coats of a matching polyurethane finish. This issue, often seen on hardwood floor polyurethane finish and gym floors, is primarily caused by poor adhesion due to inadequate surface preparation, moisture intrusion, or incompatible products. This comprehensive guide will detail the crucial steps for assessing the damage, executing both spot repairs and full refinishing, and implementing preventative maintenance, ensuring your floor retains a durable, long-lasting protective layer.
1. Why is Polyurethane Floor Peeling or Delaminating? (Identifying the Root Cause)
Understanding the cause of polyurethane delamination is the essential first step before attempting any polyurethane floor repair, as simply applying a new coat will not solve an underlying adhesion problem. Peeling or flaking indicates a bond failure between the finish and the substrate or between layers of the coating itself.
1.1. The Number One Cause: Inadequate Surface Preparation
The primary factor in nearly all coating failures is improper surface preparation. When the surface—whether wood, concrete, or an old coat—is not properly cleaned and abraded, the new polyurethane floor finish cannot bond effectively.
- Explanation: Polyurethane requires a micro-roughened surface (a “mechanical key”) to grip onto. A glossy, smooth, or contaminated surface prevents this bond.
- Handlingsbara steg: Before applying any coating, ensure the floor is:
- Completely free of contamination: This includes wax, oil residue, silicone, cleaning product residue (especially those containing ammonia or oils), or old acrylic polishes. Use mineral spirits or denatured alcohol to wipe down and degrease, if appropriate for the substrate.
- Properly abraded (Sanded or Screened): Even when recoating an old finish, the existing coat must be scuff-sanded (screened) with fine-grit sandpaper (e.g., 180-220 grit) to remove gloss and promote adhesion.
- Source/Data: According to coating industry standards (e.g., SSPC and NACE guidelines for surface prep), insufficient surface profile or the presence of contaminants is cited in over 70% of adhesion failure cases.
1.2. Application Errors and Environmental Conditions
The way the finish is applied and the conditions during curing significantly affect the lifespan and bond strength of the coating.
- Core Issue: Polyurethane peeling often results from applying coats that are too thick, insufficient drying time between coats, or extreme ambient conditions.
- Specific Errors:
- Applying too thick: Thick coats can skin over, trapping solvents beneath the surface and preventing a proper cure, leading to a soft, rubbery, or delaminated finish. Thin coats are always preferred.
- Inadequate Inter-coat Sanding: Polyurethane should be lightly scuff-sanded between coats (except the final coat) using 220-grit sandpaper to remove any defects and ensure the subsequent coat adheres well to the previous one.
- Temperature/Humidity: Applying the finish outside the manufacturer’s specified temperature and humidity range (typically 60°F–80°F and 35%–55% humidity) can dramatically slow or improperly speed up the curing process.
1.3. Moisture Intrusion
Moisture is a polyurethane finish’s biggest enemy and a common cause of failure on concrete and wood floors.
- Mechanism: Moisture (whether from a spill, high humidity, or concrete vapor transmission) can get trapped beneath the coating. As the water evaporates, the vapor pressure pushes the finish up, causing blistering and peeling.
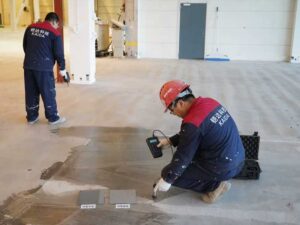
- Data Insight: For concrete, professional moisture testing (e.g., a Calcium Chloride Test or Relative Humidity Probe Test) should be conducted. A reading above the finish manufacturer’s specified limit (often around 3 lbs per 1,000 sq ft or 75% RH) indicates an active moisture issue requiring a specialized moisture mitigation system before applying a polyurethane floor sealer.
2. Step-by-Step Guide to Fixing Peeling Polyurethane (Spot Repair vs. Full Refinish)
The repair method for fixing floor finish peeling depends entirely on the extent of the damage. For minor, isolated areas, a spot repair is feasible; for widespread peeling across more than 25% of the floor, a full refinish is required for a seamless result.
2.1. Option A: Isolated Spot Repair (For Minor Flaking)
This technique is best for small, localized areas where the finish is compromised but the rest of the floor is in good condition.
| Step | Actionable Detail | Tools/Materials |
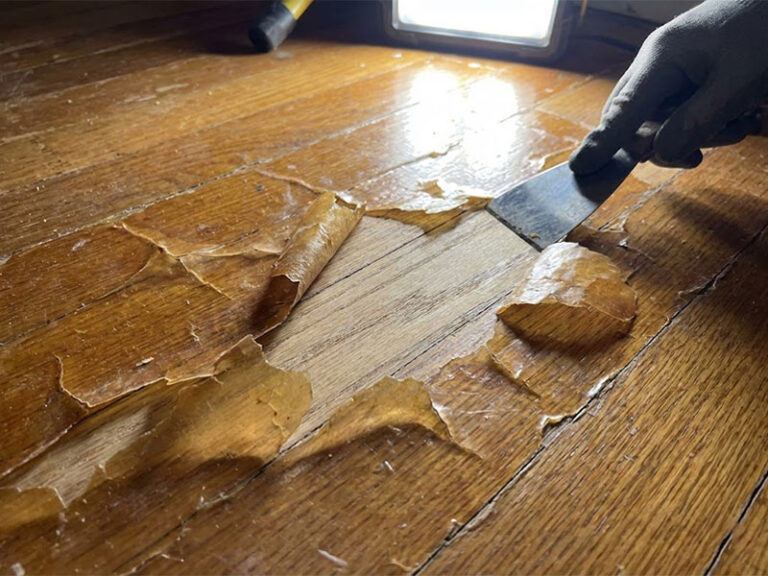
| 1. Remove Loose Material | Use a scraper or 100-grit sandpaper to remove all loose, peeling polyurethane flakes. Feather the edges of the existing, well-adhered finish so there is no noticeable ridge. | Scraper, 100-grit and 150-grit sandpaper, Sanding block |
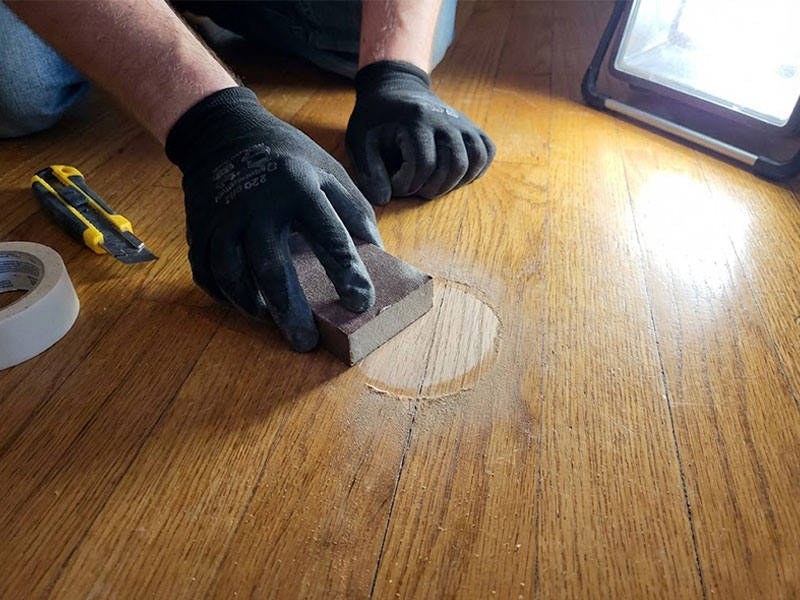
| 2. Prep the Repair Area | Lightly sand the entire immediate repair zone with 180-220 grit sandpaper to dull the old coating and ensure the new coat has a profile to bond to. Clean thoroughly. | 220-grit sandpaper, Vacuum, Tack cloth, Denatured alcohol or mineral spirits |
| 3. Apply Matching Finish | Use the same type of finish (oil-based or water based polyurethane floor finish) and sheen (e.g., satin polyurethane for floors or matte polyurethane for floors) as the existing coat. Apply a thin coat to the sanded area. | Small angled brush or foam pad, Matching polyurethane |
| 4. Feather and Re-coat | Allow to dry completely. For the next coat, extend the application area slightly beyond the first patch to blend it into the surrounding finish. Apply 2-3 coats total, sanding lightly between coats (except the last). | 220-grit sandpaper, Brush/Pad |
Q: Can I put water-based polyurethane over oil-based polyurethane?
A: Only after proper, thorough scuff-sanding. The surface must be dull, clean, and completely dry. Using a specialized water-based bonding primer is highly recommended when transitioning finishes to ensure chemical compatibility and adhesion.
2.2. Option B: Full Refinishing (For Widespread Delamination)
If the polyurethane delamination is widespread, the only professional, long-term solution is to sand the entire floor back to bare wood/substrate and start fresh.
- Sanding to Substrate:
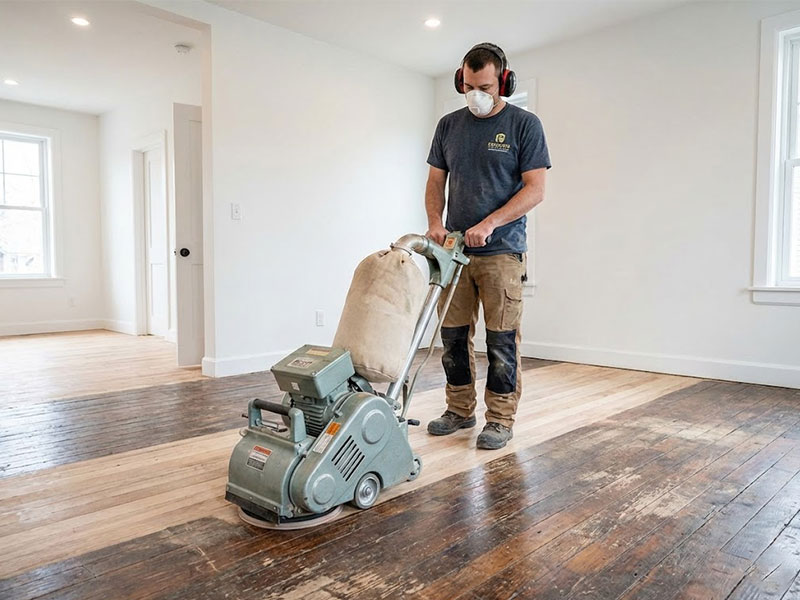
- Rent a professional floor sander (drum sander or large random orbital sander).
- Start with a coarse grit (e.g., 60-grit) to remove all existing finish, working up through finer grits (80-grit, 100-grit, and potentially a final screen with 120-grit) to achieve a smooth surface.
- Caution: On engineered wood, only screen the floor if the veneer is thick enough (typically 3mm or more).
- Rengöring: After the final sanding, vacuum the entire floor multiple times and wipe down with a tack cloth or solvent-dampened rag (mineral spirits for oil-based, water for water-based prep). The floor must be absolutely dust-free.
- Applying the New Finish:
- Choose the right product: Select a high-quality product like KAIDA PAINT’s commercial-grade, fast drying polyurethane for floors which provides superior film build and chemical resistance.
- Apply the first coat thinly and evenly.
- Allow the required drying time (often 2-4 hours for water-based, 8-12 hours for oil-based).
- Lightly abrade the first coat with 220-grit screen or pad, clean all dust, and apply the second coat.
- Apply a minimum of three coats for high-traffic areas, such as a polyurethane gym floor finish.
3. Comparing Polyurethane Finish Types and Their Repair Needs
When choosing products for recoating polyurethane floors, the finish chemistry (Oil-based vs. Water-based) is crucial, as they have different application, curing, and durability characteristics.
| Funktion | Water-Based Polyurethane | Oil-Based Polyurethane |
| Primary Advantage | Low VOC, faster drying (2-4 hours/coat), minimal odor. | Highly durable, superior chemical resistance, deep amber tone. |
| Cure Time (Light Use) | 24 timmar | 48-72 hours |
| Heltid Cure Time | 5–7 dagar | 30 days (Achieves full hardness) |
| Inter-coat Sanding | Essential for adhesion due to fast drying; use 220-grit. | Recommended; use 180-220 grit. |
| Utseende | Clear, non-yellowing. Excellent for white/light stains. | Amber hue that darkens/yellows over time. |
| Repair Factor | Requires extreme cleanliness and quick application to avoid lap marks; easier to sand. | Longer open time allows better blending; stronger odor requires ventilation. |
- Professional Insight: For maximum durability on commercial or high-traffic residential floors, many contractor-grade finishes are 2-component (catalyzed) polyurethane wood floor finish products, which offer superior cross-linking and resistance to abrasion.
4. Prevention: How to Stop Future Polyurethane Peeling
Preventing future delamination requires maintaining the correct environment and using appropriate cleaning and maintenance protocols.
4.1. Controlling Environmental Factors
- Humidity Management: Maintain stable indoor humidity, ideally between 35% and 55% year-round. Extreme dryness or wetness can cause the wood substrate to shrink or swell, putting stress on the finish film, potentially leading to cracking or peeling.
- Temperatur: Do not apply the finish below 60°F or above 85°F (15°C-30°C).
4.2. Maintenance and Cleaning Protocols
- Avoid Incompatible Cleaning Products: Never use wax, oil-based soaps, ammonia, or vinegar solutions on a polyurethane finish. These leave residues that dull the finish and, critically, interfere with the adhesion of future recoats.
- Recommended Cleaning: Use a pH-neutral, water-based cleaner specifically designed for polyurethane or hardwood floor polyurethane finish. Clean with a damp (not soaking wet) mop or cloth.
- Timely Recoating: Do not wait until the polyurethane finish has completely worn through to the bare wood, as this necessitates a full sand and refinish. Recoat the floor (screening and one new coat) every 5-10 years in residential settings or as soon as visible wear patterns emerge in commercial use.
Brand Advantage & Consultation Opportunity
KAIDA PAINT, as a trusted manufacturer and industry company, specializes in high-performance Coating solutions. Our advanced, two-component water-based polyurethane systems offer significantly lower VOCs than traditional oil-based products while meeting the highest industry standards for abrasion and chemical resistance—ideal for projects requiring a durable, clear, and fast drying polyurethane for floors.
If you are a professional contractor or managing a large facility and dealing with severe polyurethane peeling issues, we provide technical consultation and proprietary surface preparation primers to ensure maximum adhesion and a long-lasting, warranted finish. Don’t risk failure by applying new poly over a poorly bonded layer. Contact a KAIDA PAINT specialist today to determine the best approach—from surface preparation to selecting the optimal best polyurethane floor finish for your specific substrate and traffic load.
Authoritative Source & Date
- Author: Jason Zhang, Certified Coatings Specialist & Technical Director
- Affiliation: KAIDA PAINT R&D Team
- Last Updated: December 2025 (Reflecting the latest ANSI/HPVA and NWFA guidelines)
KAIDA PAINT: High-Performance Solutions for Lasting Floor Finishes
In the demanding world of floor coating and paint, failure is costly. As a specialized manufacturer and company, KAIDA PAINT addresses the core issues behind polyurethane floor peeling by providing technologically superior finishes and comprehensive contractor support. Our flagships include a range of commercial-grade water based polyurethane floor finish and oil-modified formulas, engineered for maximum inter-coat adhesion and substrate compatibility.
KAIDA PAINT Advantage:
- Engineered Adhesion: Our formulations feature specialized resins that create a stronger chemical and mechanical bond, drastically reducing the risk of polyurethane delamination, even in high-moisture or high-traffic environments (like polyurethane gym floor finish).
- Rapid Recoat Technology: Our fast drying polyurethane for floors minimizes downtime, allowing professional contractors to complete projects with multiple coats in a fraction of the time, without compromising the final cure or long-term durability.
- Teknisk myndighet: We go beyond the can. We offer expert consultation on surface preparation standards, moisture mitigation, and product selection, ensuring you apply the best polyurethane floor finish for your specific project.
Stop merely fixing peeling floors and start installing durable, long-lasting finishes. If you are seeking a reliable, high-performance solution that offers superior resistance to abrasion, chemicals, and moisture, choose KAIDA PAINT. Contact us today for a technical data sheet or to schedule a professional consultation—let us help you turn floor finish failures into a distant memory.