
A pu screed is installed in eight stages, and four of them are hold points where work should stop until something has been checked.
The installation sequence runs from survey and preparation through the primer coat, the body coat, the seal coat and the joints, with curing between each layer.
This article sets out each stage in order, the timing that links them, and the failures that follow when a stage is compressed to save a day.
The eight stages at a glance
The sequence is fixed. Each stage depends on the one before it, and skipping forward is what produces the failures that appear six months later.
Survey, preparation, primer, body, seal, joints, cure, handover. The first two are where most of the risk sits, and they are the two most often cut on a tight programme.
Table 1: The stages, the time each takes, and whether it is a hold point.
| Stage | Typical time | Hold point |
|---|---|---|
| Survey and moisture test | Half a day | Yes |
| Preparation and profile | 1 day per 400 m2 | Yes |
| Primer | 2-4 hours | No |
| Body, first pass | 1 day per 300 m2 | Yes |
| Body, second pass | Half a day | No |
| Seal | 2-3 hours | No |
| Joints and details | Half a day | Yes |
| Cure and handover | 24-48 hours | No |
The table also shows where each quality hold point falls. Three of the four sit inside the first two days, which is why a floor that is rushed fails early and a floor that survives the first week usually lasts.
Those durations are for a 300 to 400 square metre area with normal access. A hall of 2,000 square metres needs a rolling programme rather than a longer version of the same list.
Stage one: survey, and the first hold point
The survey records the slab, the moisture reading, the existing coating if there is one, and the details that will need work: drains, plinths, door thresholds and movement joints.
This is the first quality hold point. No material should be ordered until the moisture result is in hand and the substrate has been accepted by the installer.
The survey should also record every joint detail on the drawing, with a note of whether it is still moving. That list becomes the detail scope later, and it is much harder to compile once the floor is covered.
A pu screed is more tolerant of moisture than a thin coating, but tolerant is not unlimited. A slab at 90 per cent relative humidity will still cause trouble under a 6 millimetre build.
Photograph the survey. A floor is a large object and the areas that fail are usually the ones nobody recorded.

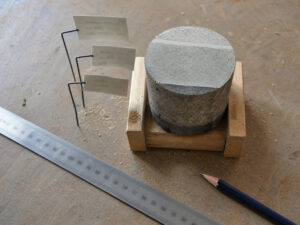
Figure 1: the meter rests on the slab between readings, and the probe lead runs back to a second hole.
Stage two: preparation and profile
Preparation for a pu screed is a blast or a coarse grind to CSP 3 to 5, removal of laitance and any curing compound, and a vacuum pass. The surface profile grade it leaves is the bond surface for every layer above it.
The second hold point is the profile check. A pu screed at 6 millimetres tolerates a rougher surface than a coating, and it still needs an open, uncontaminated one.
Edges, plinths and drain surrounds need hand tools. Those areas receive the same material as the open floor and fail first if they are prepared to a different standard.
Where the primer coat is specified as a two-component epoxy rather than a polyurethane, check the moisture tolerance again. Primer chemistry and slab condition have to match, and that match is decided here rather than at the drum.
Check the profile before priming, not after. Once the primer is down, a poor profile is invisible and permanent.
Stage three: the primer coat
The primer coat penetrates the open concrete, seals the surface and provides the bond for the body. It is applied at 300 to 500 microns and it is usually the thinnest layer in the build.
Prime in one direction and check for dry patches. A missed patch is a void under 6 millimetres of material, and it will not be found until the floor sounds hollow.
The primer must be allowed to reach the point where the body will bond to it. Too early and the solvent is trapped; too late and the surface has to be abraded.
The installation sequence assumes the primer is covered before it is contaminated. On a building with trades still working, that is the stage where dust lands, and a covered section is the only protection that works.
On a large area, prime in sections that can be covered the same day rather than the whole hall at once.
Stage four: the body, in two passes
The body coat is the structural layer, typically 4 to 8 millimetres, and it is placed in two passes on most specifications: a scratch pass that keys into the primer and a build pass that reaches the specified thickness. Its declared strength class comes from the material datasheet, not from the thickness measured on site.
The first pass is trowelled thin and tight. Its job is to fill the profile and remove air, not to build height.
The second pass is placed while the first is still workable, or after it has cured enough to walk on, depending on the product. The datasheet decides, not the crew.
A trowel finish is judged by eye and by hand. A good one has no trowel ridges, no dry patches and no visible laps, and it feels uniform under a straight edge across the whole area, including the corners where the machine cannot reach.
The third hold point is thickness and bond after the body has cured. A core sample or an ultrasonic reading settles both questions in ten minutes.
Table 2: What each layer is for, and how it is checked.
| Layer | Function | Check |
|---|---|---|
| Primer | Bond and seal | Coverage, no dry patches |
| Body, pass one | Fill profile | No air, full contact |
| Body, pass two | Build thickness | Core or gauge |
| Seal | Wear and cleanability | Uniform film, no laps |
Stage five: the seal coat
The seal coat is the layer the plant actually touches. It carries the wear, provides the cleanability, and holds the slip aggregate if one is specified.
It is applied at 400 to 600 microns, usually by roller, and the quality of the finish is decided by the roller technique rather than the product.
Laps and ridges are the common defects. They trap dirt, they show under grazing light, and they cannot be corrected without another coat.
Where aggregate is broadcast, it goes on while the seal is still open, and the excess is removed after cure. A patchy broadcast is invisible until the floor is wet.
Stage six: joints and details
Joint detail is where a floor either accommodates movement or cracks. Movement joints in the slab must be carried through the resin, and construction joints must be treated according to whether they are still moving.
Every joint detail needs a decision recorded: carry the joint through, fill it with a flexible sealant, or armour it with an angle. The wrong choice is not visible until the slab moves, which is usually the first winter.
Coves, plinths and drain surrounds are formed at this stage. A coved skirting is not decoration; it is what allows a production room to be washed without a dirt trap at the wall.
The fourth hold point is the detail inspection, and it should happen with the client present. Details are the parts of a floor that a hygiene auditor will photograph.
Any movement joint that has been filled solid is a future crack, and it is much cheaper to correct before handover than after a failure.

Figure 2: the cove runs into the drain collar without a break, and the wall tiles start above the upstand.
Stage seven: cure and the timing between coats
Curing time is not a single figure. Each layer has its own window, and the programme has to be built around them rather than around the crew’s availability.
The curing time printed on a datasheet is measured on a laboratory film, so it describes the product rather than the building. A plant room at 12 °C with no air movement will take longer than any figure in a brochure, and the programme should assume it.
A primer may accept the body after four hours at 20 °C and reject it after twenty-four. A body may accept the seal after eight hours and need abrasion after two days.
Where a pu screed is installed over a weekend, the gaps between layers must fit inside the working hours. Two 12-hour days are usually enough for primer, body and seal on a moderate area.
The curing time for the seal is the one that most often gets truncated. A client who wants to walk on the floor on Monday will accept a longer body cure and then push on the seal, which is the layer that shows every mark.
Cold weather stretches every window. A floor at 10 °C may need twice the time between coats, and the programme should say so before the crew arrives.
Table 3: Typical intervals at 20 °C.
| Between | Earliest | Latest |
|---|---|---|
| Primer and body | 4 h | 24 h |
| Body pass one and two | 4 h | 24 h |
| Body and seal | 8 h | 48 h |
| Seal and traffic | 12 h | No limit |
| Seal and washdown | 7 days | No limit |
Where an area has to be opened in stages, the seal is the last operation, and every stage behind it must be complete before the section opens. A seal coat over a body that is still soft will craze within days.
The full chemical cure sits outside the table, seven days after the seal, and the right-hand column matters as much as the left. A window that has expired means abrasion, and abrasion on a fresh trowel finish is the fastest way to ruin a finish that was acceptable an hour earlier.
Stage eight: handover that a client can use
Handover is a short document with the build, the products, the thickness readings, the hold point records and the cleaning instructions, and it is not a signature.
The handover pack should also repeat the quality hold point records, because they are the evidence that the build matches the specification. A client who keeps them has an answer when a later contractor blames the original floor.
A cleaning team that starts caustic washdown on day two will damage a floor that is otherwise perfect, and the cure date belongs on the wall of the plant room rather than in a file.
Photograph the finished floor before any traffic. It is the reference for every later discussion about wear and damage.
Leave a small pot of the seal material with the client, labelled. Touch-up in year three is much easier when the original batch is available.
What goes wrong when a stage is compressed
Compressing preparation produces a floor that sounds hollow within a year. Compressing the primer produces pinholes and patches of poor bond.
Compressing the body produces thin areas that wear through in the traffic lanes, and a thickness check would have found them.
A body coat that is laid too thin is the most common form of compression, and it is invisible under a seal. A core from a quiet corner and one from a traffic lane will show the difference immediately.
Compressing the seal produces laps and a surface that traps dirt, which in a food plant is a hygiene finding rather than a cosmetic one.
Compressing the cure produces footprints, wheel marks and a dull surface. None of those are repairable without a further coat.
Every one of those failures is cheaper to prevent than to fix by an order of magnitude. That is the argument for the four hold points, and it is the argument we make to clients who want the floor back early.
Who does what on the day
A pu screed of any size needs at least three roles: a mixer, a troweller and a person checking levels and edges. Two people on a 300 square metre pour will lose the surface.
The mixer controls the pot life and the ratio. The troweller controls the trowel finish and the thickness. The third person controls the detail work that the other two cannot reach.
For a pu screed above 800 square metres, split the area into pours that match the material volume rather than the drawing grid. A pour that runs out of material mid-bay leaves a cold joint that has to be cut out and redone.
On a large hall, add a fourth for material movement and a fifth for the edges if the perimeter is long. Labour is the variable that decides whether a programme is achievable.
The installation sequence does not change with crew size, but the time each stage takes does. Plan the crew around the sequence rather than the other way round.
Frequently asked questions
How long does a PU screed installation take?
Two days for primer, body and seal on 300 to 400 square metres at 20 °C, plus 24 to 48 hours before full traffic.
Can the body coat be applied in one pass?
On thin builds below 4 millimetres sometimes, but a two-pass body is standard above that. The first pass fills the profile and the second builds thickness.
How soon can the seal go on?
Typically 8 to 48 hours after the body at 20 °C. Outside that window the body must be abraded first.
When can a PU screed be washed with chemicals?
At full cure, usually seven days. Caustic washdown before that can dull or etch the seal.
Do movement joints need to be carried through the screed?
Yes. A joint that is filled solid will crack, and the crack will follow the joint line.
What is a hold point in a screed installation?
A stage where work stops until something is inspected: the survey, the profile, the body thickness and the details.
Can a PU screed be installed over an existing floor?
Sometimes, if the existing film is sound and abraded. A trial patch and a bond test decide it, not a visual inspection.
Why food plants work with Kaida Paint
Kaida Paint supplies the full pu screed build, from primer to seal, with the intervals between layers stated on each datasheet and the hold points written into the method statement. Send the area, the temperature and the access, and we will return a stage-by-stage programme with the hold points marked and the crew numbers each stage needs.



 English
 Spanish
 Portuguese
 Arabic
 French
 Italian
 Russian
 Indonesian
 Swedish