
Concrete moisture testing answers one question before any coating is ordered: how much water is moving through this slab, and will it lift a floor?
Two tests answer it, and they do not measure the same thing. A calcium chloride test measures the rate at which vapour leaves the surface; an in-situ probe measures the relative humidity inside the slab.
This article explains both methods, the limits that matter for a polyurethane system, why the two can disagree on the same floor, and how to write the result into an acceptance record.
The short answer: use both, and know which one governs
The humidity probe is the better test for a modern specification. It measures the condition inside the slab, it is repeatable, and it gives a temperature reading alongside the humidity.
Calcium chloride test remains useful for two reasons. Many older specifications are written in its units, and it measures the actual vapour emission rather than inferring it.
Where the two disagree, the probe usually governs the coating decision and the chloride result explains why a floor that passed in the lab is blistering in service.
The order in which the two are taken matters less than taking both on any slab that is new, cold or previously covered. Concrete moisture testing done once at the design stage removes an argument that otherwise surfaces after the first wet season.
Neither test is expensive. A pair of tests on a 1,000 square metre slab costs less than a single square metre of remedial work.
What each test actually measures
The chloride method places a weighed dish of calcium chloride under a sealed plastic dome for 60 to 72 hours. The dish gains weight as it absorbs vapour, and the gain is converted into a rate.
That rate is expressed in pounds per 1,000 square feet per 24 hours, or in metric units as grams per square metre per 24 hours. It describes flux at the surface, not the water content of the slab.
The probe method drills a hole to 40 per cent of the slab depth, lines it with an insulated sleeve, seals it, and leaves a humidity sensor to equilibrate. The result is a percentage relative humidity at that depth.
The 40 per cent depth is deliberate. A slab dries from the top, so a shallow reading describes the dried skin rather than the body that will feed vapour for years.
That distinction matters commercially. A supplier asked to warrant a concrete moisture testing result needs to know which quantity was measured, because a vapour emission figure cannot be compared with a humidity figure and the two are often quoted interchangeably in tender documents.
Table 1: The two methods compared.
| Articolo | Calcium chloride | In-situ RH probe |
|---|---|---|
| Standard | ASTM F1869 | ASTM F2170 |
| Measures | Vapour emission rate | Internal relative humidity |
| Unit | lb/1,000 ft2/24 h | % RH |
| Time on site | 60-72 hours | 24-72 ore |
| Depth | Surface | 40% of slab |
| Repeatability | Moderato | Buono |
Running the calcium chloride test properly
The calcium chloride test returns a usable emission rate only when the slab is bare, the dome is sealed and the conditioning period is complete. Those three points are where most of the on-site error sits.
Grind or blast the test area to bare concrete, to the surface profile grade the coating will need anyway. A coating, a sealer or a curing compound will hold vapour back and produce a falsely low result, which is the most common error on a new slab.
Where a client has an old report in chloride units, that number can be used as a starting point for concrete moisture testing but not as a substitute for it. The two standards were written for different questions.
Three dishes are usually placed for the first 1,000 square feet and one more for each additional 1,000. Record the slab temperature, because the emission rate rises with it.
Read the result as a flux. A value under 3 pounds per thousand square feet per day is accepted by most coating manufacturers; above 5 lb, only a moisture-tolerant system or a barrier should be considered.
The dish also reports nothing about depth, so a slab with a dry top and a wet base will pass. That is the case the probe was designed for, and it is the reason concrete moisture testing moved towards in-situ measurement.
One limitation is worth stating plainly: the dish measures what reaches it in three days. A slab that is still drying will give a different answer next month, which is why the conditioning period matters.
Running the RH probe test properly
The probe test needs a hole drilled below the dried skin, cleaned thoroughly, lined with an insulated sleeve and sealed at the top. At 40 per cent of the slab depth the sensor sits in a closed cavity that equilibrates with the concrete around it.
Equilibrium moisture takes time. The standard allows 72 hours, and although fast-response sensors reduce that, a reading taken after two hours is not an equilibrium reading.
The reading itself is an equilibrium moisture value rather than an absolute water content. It describes the humidity the air in the pore structure has reached, which is what the coating will actually experience.
The slab has to stay sealed for the whole test. A hole left open to the room will drift towards room humidity, and a hole near a door will drift further.
Where a slab is to receive a concrete moisture testing record for a client, take the temperature at the same depth as the sensor. It is the one number that explains a reading taken in February. A standard polyurethane system accepts up to 75 per cent relative humidity, and a moisture-tolerant primer takes that ceiling to 85 or 90.

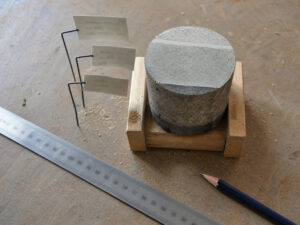
Figure 1: the holes are spaced evenly across the bay, and each one has its own slug of drill dust beside it.
Why the two results disagree
The tests measure different quantities, so disagreement is expected rather than suspicious. A slab can hold a high internal humidity and still emit slowly if the surface is dense and the temperature is low.
Temperature explains most of the gap. A cold slab holds vapour and releases it slowly, so a chloride result looks good in winter and fails in summer with the same slab and the same coating.
Surface condition explains the rest. A power-trowelled slab with a dense skin, or one that has been coated with a curing compound, will emit less than its internal humidity suggests, and concrete moisture testing run on that surface will look better than the slab deserves.
Where the two disagree significantly, treat the higher-risk reading as the governing one. That is not conservative for its own sake; a blister is expensive and a barrier is not.
Table 2: Typical limits by system, and what to do when exceeded.
| Reading | Standard PU | Action |
|---|---|---|
| Under 75% RH | Acceptable | Proceed |
| 75-85% RH | Marginal | Moisture-tolerant primer |
| Over 85% RH | Not acceptable | Barrier or wait |
| Under 3 lb | Acceptable | Proceed |
| Over 5 lb | Not acceptable | Barrier system |
Where moisture testing goes wrong on site
Most failed concrete moisture testing results on site come back to timing, location and surface condition rather than to the meter itself. The first error is testing too early. A slab needs 28 days to reach design strength, and it needs far longer than that to dry. Testing at 14 days measures the curing water, not the service condition.
The second is too few locations. One result on a 2,000 square metre floor describes one square metre, and slabs vary with pour sequence, thickness and cover, so a single figure is not concrete moisture testing in any useful sense.
The third is surface moisture being mistaken for slab moisture. A damp patch on the surface may be condensation, a leak or a spill, and none of those are answered by a probe reading.
Surface moisture readings taken with a hand-held meter are a screening tool, not a test. They read the top few millimetres, they are affected by the surface finish, and they cannot be used as acceptance evidence.
The fourth is testing a floor that is not at service temperature. A building without heating in February will fail a test in July, and the difference is not the concrete.
A fifth is testing a slab with a patch repair. New screed inside an old slab dries at a different rate, so surface moisture over the patch and the slab body disagree for months.
- Test at least 28 days after the pour, and later if the slab is thick.
- Test in the condition the building will operate in.
- One location per 200 to 500 square metres, plus any suspect area.
- Photograph every hole and log the depth and slab thickness.
The sealed slab condition and why it matters
Sealed slab testing means the building envelope is closed, the slab is at service temperature, and no wet trades are running. It is the condition the floor will live in, and it is the only condition that predicts performance.
A sealed slab will read differently from an open one. In winter, a closed unheated building can hold a slab at 8 °C, and the same slab in June reads five points higher.
The conditioning period also has to be long enough for the reading to mean anything. Three days under a dome or three days in a sealed hole are the minimum, and a contractor under programme pressure will be tempted to shorten both.
Where a project cannot meet the condition, record the deviation on the test certificate. A result without a condition is a number without a meaning.
This is also where equilibrium moisture takes longer than the programme allows. A 200 millimetre slab can take six months to dry to 75 per cent in a cool building, and no primer shortens that.
What different primers will tolerate
Primer tolerance is the practical link between a test result and a specification. A standard epoxy primer tolerates 75 per cent; a moisture-tolerant epoxy or a polyurethane primer may accept 85 to 90.
Primer tolerance is also a temperature question. A primer rated to 85 per cent at 20 °C may only accept 80 at 8 °C, because the reaction slows and the film stays permeable for longer.
Tolerance is not permission. A primer that accepts 90 per cent will still fail where liquid water is present, and it will still blister over a slab with no vapour control.
Where readings sit in the marginal band, the options are a moisture-tolerant primer, a surface barrier, or waiting, and the primer coat stage is where primer tolerance is tested. The first is cheapest and the third is usually the right answer on a new building.
Where the primer tolerance band is narrow, plan the pour around it. A floor laid in a dry month with the heating on will pass a test that the same slab would fail in March, and that is a programme saving rather than a coating upgrade.
Ask for the number in writing. A datasheet that says suitable for damp concrete without a percentage is not a specification.
Reporting a result that can be defended
A useful record has four parts: the method, the locations, the conditions and the readings. Without the conditions, a reading cannot be compared with anything.
Mark each location on a plan and keep the plan with the contract documents. When a blister appears two years later, the plan is the first thing anyone asks for.
Table 3: What belongs in a moisture test record.
| Field | Example |
|---|---|
| Metodo | ASTM F2170, in-situ probe |
| Locations | Grid reference on plan, 12 points |
| Depth | 40% of 150 mm slab, 60 mm |
| Age of slab | 42 days at test |
| Conditions | Sealed, 18 °C, 55% room RH |
| Equilibration | 72 hours |
| Risultato | 72-81% RH across the grid |
That table takes ten minutes to complete and it is the difference between a defensible floor and an argument. On the projects we are asked to inspect, the missing field is almost always the conditions.
What to do when the slab fails
The first response is to wait and retest. Most failures on a new slab are a drying problem rather than a permanent condition, and four weeks often moves a reading by five points.
Where waiting is impossible, a moisture barrier is the reliable answer. A two-coat epoxy barrier, a cementitious moisture barrier or a loose-lay membrane all work, and each has a different cost and thickness.
What does not work is a thicker topcoat, and neither does a polyurethane over epoxy coat, which inherits the same vapour drive from below. Adding polyurethane over a wet slab increases the vapour pressure behind the film and makes the blister larger when it finally releases.
A second reading after four weeks of drying is the cheapest diagnostic available, and it is the first thing we ask for when a client reports a failed concrete moisture testing result on a slab that was poured last month.
Ventilation and dehumidification are cheaper than any barrier and are usually the correct first step. A closed building with no air movement will hold moisture in the slab for months.

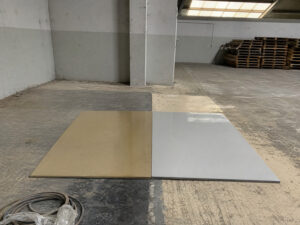
Figure 2: the ducts run to a closed opening, and the surface is lighter in the foreground than in the shaded strip near the wall.
The test you should never skip
Every failure we have inspected on a first-floor slab came back to one of two things: no test, or a test taken in the wrong condition.
Concrete moisture testing is cheap, fast and unglamorous, and it is the only part of a coating project that can prevent a total loss.
Two methods, one record, and a number that a supplier will accept in writing. That is the whole requirement, and it fits on a single page.
Frequently asked questions
Which moisture test is better before a PU coating?
The in-situ RH probe, because it measures the slab body rather than the surface flux. The calcium chloride test remains useful where a specification is written in its units.
What is an acceptable moisture level for a polyurethane floor?
Generally under 75 per cent RH by probe, or under three pounds by the dish method where the specification is still written in those units. Some primers accept more.
How long should concrete dry before testing?
At least 28 days, and often much longer. A 150 millimetre slab in a cool building can take three to six months to reach 75 per cent.
Why do calcium chloride and RH probe results disagree?
They measure different quantities. Temperature and surface density affect the emission rate but not the internal humidity, so the two can diverge on the same slab.
How deep should the probe hole be?
Forty per cent of the slab depth. That avoids the dried surface skin and describes the body that will feed vapour over time.
Can a primer fix a wet slab?
A moisture-tolerant primer can bridge a marginal reading. It cannot fix a slab with liquid water or a failed vapour control layer.
How many test locations do I need?
One per 200 to 500 square metres, plus every area that looks different. A single result on a large slab is not a survey.
Why food plants work with Kaida Paint
Kaida Paint supplies primers with stated moisture tolerance, and we ask for concrete moisture testing results before quoting a system for a new slab. Send the readings with the conditions and the slab age, and we will say whether a standard primer is enough or whether the floor needs a barrier.


 English
 Spanish
 Portuguese
 Arabic
 French
 Italian
 Russian
 Indonesian
 Swedish