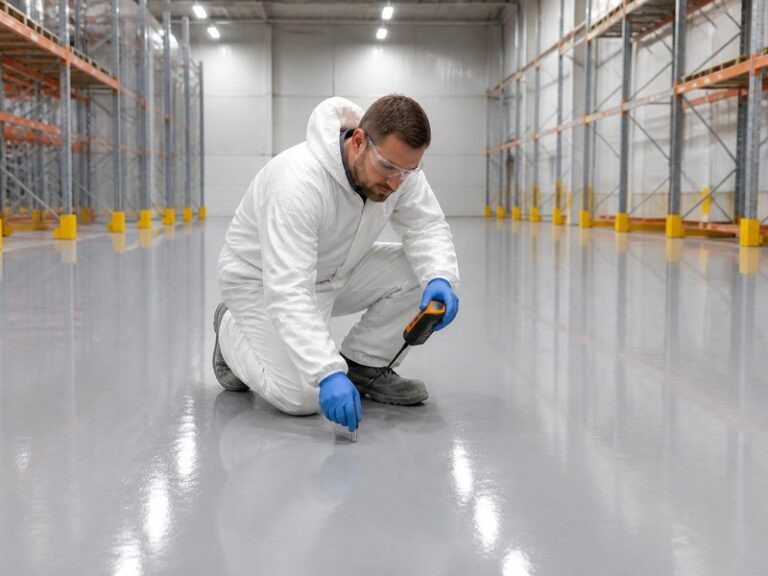
What are the most common commercial flooring installation mistakes? The top five: skipping concrete moisture testing, rushing surface preparation, ignoring temperature and humidity limits, choosing the wrong flooring system for the environment, and opening the floor to traffic before full cure. For facility owners and specifiers, these mistakes cost more than repair bills – closed aisles, stopped forklifts, and food-safety shutdowns. This guide covers the physics behind each failure, the test methods that prevent them (ASTM F2170, ICRI concrete surface profile, ASTM D4541), step-by-step correction procedures, and a pre-installation checklist you can hand to any contractor.
Commercial flooring installation mistakes cost more than residential ones because downtime is priced in lost revenue, not just repair labor. A failed retail floor means closed aisles, a failed warehouse floor means stopped forklifts, and a failed food plant floor means a shutdown plus a food-safety audit. In our work at KAIDA PAINT – a manufacturer of epoxy, polyurethane, urethane cement, and MMA resinous flooring systems – we have documented these failure modes across hundreds of projects in 40+ countries, and the pattern is remarkably consistent: the top five mistakes below account for the overwhelming majority of callbacks, warranty claims, and premature replacements we see in commercial epoxy flooring, industrial polyurethane floors, and urethane cement systems.
1. What Are the Most Common Commercial Flooring Installation Mistakes?
Short answer: five failures account for most premature floor problems in commercial buildings – moisture mismanagement, poor surface preparation, uncontrolled environmental conditions, wrong system selection, and early traffic reopening. These are not exotic failures. They are routine decisions made on site, and each one has a measurable consequence.
The top 5 commercial flooring installation mistakes and their typical consequences
| Mistake | What goes wrong | Typical consequence |
|---|---|---|
| 1. Skipping concrete moisture testing | Moisture vapor rises through the slab and presses on the coating film | Osmotic blisters, delamination, white salt efflorescence within months |
| 2. Rushing surface preparation | Laitance, curing compounds, oil, and dust remain between slab and coating | Adhesion failure, peeling under forklift traffic, coating lifts in sheets |
| 3. Ignoring temperature and humidity | Condensation forms at the dew point; resin cures slowly or not at all | Fisheyes, blush, soft film, missed recoat windows, weak interface layers |
| 4. Wrong flooring system for the environment | Standard epoxy specified where thermal shock, chemicals, or washdown rule | Cracking, chemical staining, floor replacement within 1-3 years |
| 5. Opening to traffic before full cure | Forklifts and trolleys run on a film that has not reached design strength | Scuffing, wheel-mark damage, joint spalling, shortened service life |
The rest of this article takes each mistake in turn: why it fails, the data behind it, and exactly how to avoid it. If you only remember one sentence, remember this one: in commercial flooring, the quality of the floor is decided before the first coat is poured.
Key numbers at a glance: commercial flooring installation
| Parameter | Value | Standard / note |
|---|---|---|
| Moisture – in-situ RH | 75% RH or below: standard system; 75-85%: moisture-tolerant primer; above 85%: barrier, breathable, or urethane cement | ASTM F2170, 40% depth, 72 h equilibration |
| Moisture – vapor emission | 3 lbs per 1000 ft² per 24 h limit | ASTM F1869 |
| Surface profile | CSP 2-3 minimum; CSP 4-5 for 100% solids and self-leveling epoxy | ICRI, verify with chip kit |
| Environment | 10-30°C (50-86°F); substrate at least 3°C (5°F) above dew point | Log before every pour |
| Cure at 23°C (73°F) | Epoxy 24-48 h foot / 7 days full; urethane cement about 24 h; MMA 1-2 h | Extend at lower temperatures |
| Budget benchmark | Epoxy $4-9/sq ft installed (new-install); urethane cement 1.5-2.5x | Planning only; region varies |
2. Why Do Commercial Flooring Installations Fail?
Roughly 80% of premature coating failures trace to surface preparation and bonding problems rather than to coating material quality – a finding consistent across failure-analysis literature published by AMPP (formerly NACE) and the Society for Protective Coatings (SSPC), and detailed further in our ICRI concrete surface profile guide. When a commercial epoxy flooring system fails, the odds are four in five that the cause was something that happened on the concrete before or during installation, not a defect in the product.
The commercial floor coatings market tells the same story from the demand side. The global floor coatings market was valued at 3.7 billion USD in 2025 and is projected to reach 6.3 billion USD by 2033 (Grand View Research, Floor Coatings Market Report), a compound annual growth rate of roughly 6.9%, driven by warehouse, food processing, healthcare, and retail construction. Industrial epoxy flooring and urethane cement systems account for a large share of this demand in warehouses, food plants, and cold storage. More installed square meters means more opportunities for installation errors, which is why the five mistakes below appear so consistently in warranty claims and failure investigations.
An honest framing: every coating chemistry has operating conditions, and installation decides whether those conditions are met. A stronger topcoat will not repair a wet slab, a dusty surface, or an early forklift. Material manufacturers, including us at KAIDA PAINT, are responsible for the formulation; the installer is responsible for the conditions the formulation needs. Our warranty documents this boundary explicitly, because accountability on both sides is what makes a floor last.
3. Mistake #1: Skipping Concrete Moisture Testing – How Wet Is Too Wet?
The mistake: installing a resinous floor on concrete whose internal moisture level was never measured. The slab looks dry, so the crew proceeds. The floor fails weeks later with blisters filled with liquid.
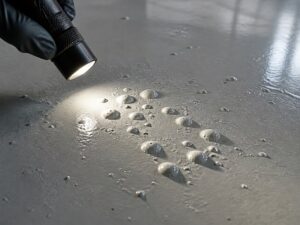
Why it fails: concrete releases water vapor for years after placement. This is moisture vapor transmission (MVT), and it acts like a pump pressing vapor against the underside of an impermeable coating film. When vapor pressure exceeds the film’s adhesion strength, the film lifts locally and forms osmotic blisters. Soluble salts carried up with the vapor then crystallize under the film, accelerating the failure. The damage is invisible during installation because vapor pressure builds over weeks.
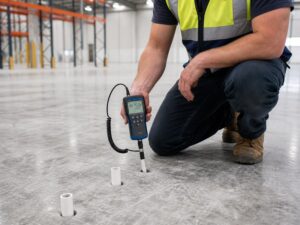
The data: the industry standard is in-situ relative humidity testing per ASTM F2170. Probes are drilled into the slab to 40% of its depth and left to equilibrate for at least 72 hours. The numbers that matter:
- Below 75% RH: a standard epoxy primer and system can proceed.
- 75-85% RH: specify a moisture-tolerant primer and monitor during installation.
- Above 85% RH, or moisture vapor emission above 3 lbs per 1000 ft² per 24 hours (ASTM F1869 calcium chloride test): standard primers are limited to slabs at or below 85% RH; use one of three systems – a dedicated moisture barrier, a breathable coating, or a urethane cement floor.
If the slab sits on a below-slab vapor barrier, moisture risk drops, but verify with testing anyway. If the project has no below-slab vapor barrier, plan for a topical moisture barrier or a urethane cement system rather than relying on primer alone.
Use ASTM D4263 only as a screening tool. Release a slab for coating only on the basis of ASTM F2170 in-situ RH results. Our laboratory and field testing shows that floors installed on slabs reading above 85% RH fail at dramatically higher rates, regardless of the topcoat used.
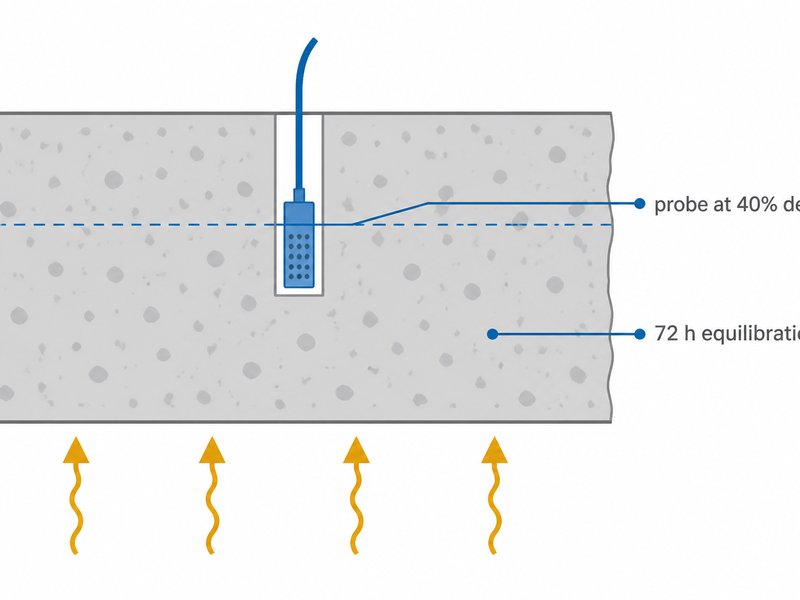
Figure 2. ASTM F2170 in-situ RH testing: the probe is installed at 40% of the slab depth and equilibrated for at least 72 hours before the numbers are trusted.
How to avoid it: run concrete moisture testing per ASTM F2170 before scheduling installation, not after. On new slabs, run it no earlier than 28 days after placement; earlier readings are not representative of long-term slab moisture. Document the readings in the project file. If the numbers exceed the threshold, re-schedule the work or change the specification. Concrete can look perfectly dry for months while internal RH sits at 90%; the probe does not lie, and the eye does.
Field example: in a food processing plant renovation, the slab surface was dry to the touch, but ASTM F2170 in-situ relative humidity probes read 88% RH. The specification was changed from a standard epoxy system to a flexible polyurethane system with a moisture-tolerant primer. Two years later, that area shows zero blisters, while an adjacent bay installed earlier without testing delaminated within seven months. One test separated the two outcomes.
4. Mistake #2: Rushing or Skipping Surface Preparation – Does the Slab Need a Profile?
The mistake: grinding or shot blasting is shortened to save a day of schedule, or skipped entirely because the slab “looks clean.” Laitance, curing compounds, oil residue, and dust stay on the surface, and the coating is applied on top of them.
Why it fails: resinous coatings bond by two mechanisms – mechanical grip into surface pores and chemical wetting of the substrate. A power-troweled or burnished slab is dense and slick, with almost no profile for the resin to grip. Laitance, the weak cement paste that forms on fresh concrete, acts as a release layer: the coating bonds to the laitance, and the laitance bonds to nothing. Curing compounds and oils contaminate the surface chemistry and block wetting entirely.
The data: the concrete surface profile (CSP) scale published by ICRI (International Concrete Repair Institute) is the reference used across the industry. Mechanically prepared concrete for resinous flooring starts at ICRI CSP 2-3, a profile equivalent to medium sandpaper; thicker systems need more. Match the profile to the system thickness – typically CSP 4-5 for 100% solids and self-leveling epoxy systems (see our ICRI concrete surface profile guide). For moisture-sensitive systems, use mechanical preparation (diamond grinding or shot blasting) to reach the required profile; acid etching is limited to low-risk applications, because it closes the surface and leaves salts behind.
Adhesion is then verified with pull-off testing per ASTM D4541. In KAIDA PAINT’s laboratory and field testing, properly prepared and primed systems consistently achieve pull-off values above 1.5 MPa (≈218 psi), while the same topcoat applied over an unprepared, dusty slab often fails below 0.5 MPa (≈73 psi) at the concrete interface. The topcoat did not change; only the preparation did. The same pattern holds across commercial and industrial epoxy flooring projects alike, matching the failure-analysis finding that roughly 80% of premature coating failures trace to preparation and bonding.
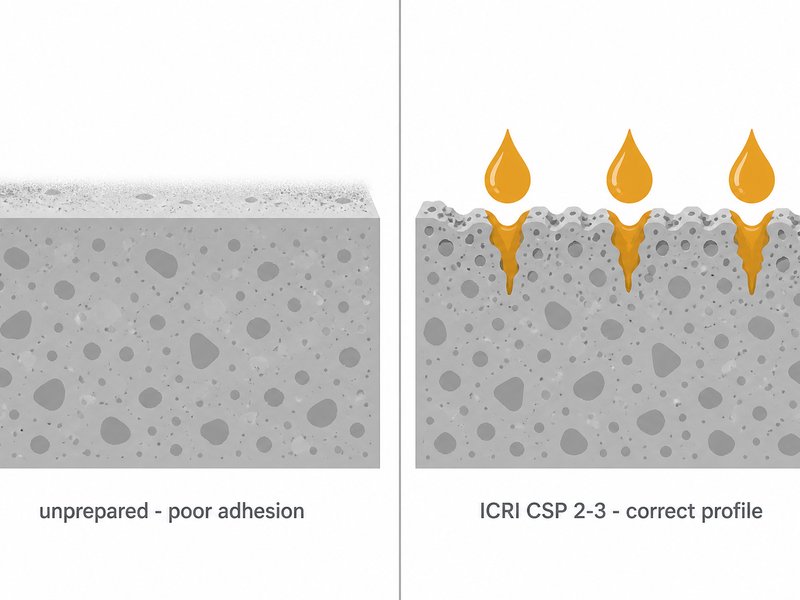
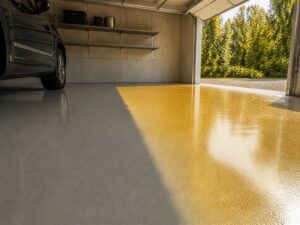
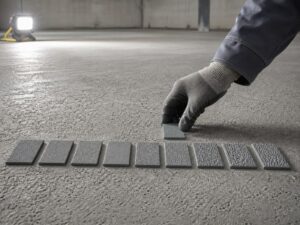
Figure 3. The surface profile decides the bond. Laitance and dust on the left release the coating; a diamond-ground CSP 2-3 profile on the right gives the resin the pores it needs to grip for primers and thin-film systems.
How to avoid it:
- Mechanically prepare to the ICRI CSP required by the specified system – CSP 2-3 minimum for primers and thin films, CSP 4-5 for 100% solids and self-leveling epoxy; verify with the ICRI chip kit, not by feel.
- Vacuum with an industrial machine and HEPA filtration, then inspect under raking light. Any remaining dust defeats the coating.
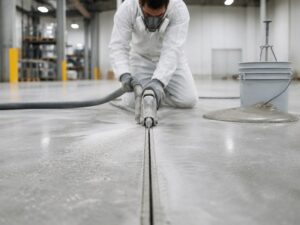
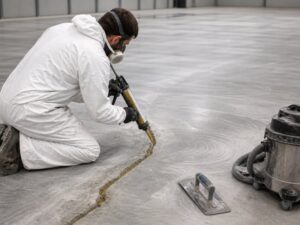
- Repair cracks and control joints before coating, filling them with a compatible joint filler; joints telegraph through thin films and fail first under premature loading.
- Apply a compatible epoxy floor primer to consolidate fines, equalize suction, and lock the bond; the primer is not optional on concrete.
- Check surface pH. Fresh concrete sits at pH 12-13, and some primers tolerate high pH better than others.
Field example: in a 6,000 m² (≈64,600 sq ft) distribution warehouse, a contractor installed a 3 mm (1/8 in.) self-leveling epoxy system directly on a power-troweled slab to save one day of schedule. Within four months, forklift wheels peeled roughly 200 m² (≈2,150 sq ft) of the floor. The repair required removal of the failed area, re-preparation, and reinstallation at roughly ten times the cost of the preparation that was skipped. We have documented this exact pattern in multiple countries; the failure is always the same, because the physics is always the same.
5. Mistake #3: Ignoring Temperature, Humidity, and Dew Point – Is the Environment in Range?
The mistake: pouring resin without checking substrate temperature, air temperature, relative humidity, and dew point. The crew follows the label’s mixing instructions but ignores the environment the resin is curing in.
Why it fails: resin chemistry is temperature-driven. Below the minimum application temperature, epoxy cures slowly or incompletely, producing a soft film that never reaches design strength. When the substrate temperature falls to the dew point, condensation forms a microscopic water film on the concrete; the resin then cures over a layer of water, causing fisheyes, blush, and weak adhesion at the interface. Humidity also extends cure times and can force the crew past the recoat window, after which a new layer no longer bonds to the previous one.
The data: most solvent-free epoxy systems require substrate and ambient temperatures between 10°C and 30°C (50-86°F), with the substrate at least 3°C (≈5°F) above the dew point during application and cure. Polyurethane systems have similar constraints. MMA (methyl methacrylate) systems are the exception, curing reliably down to about -20°C (-4°F), which is why they dominate cold-storage and winter fast-track work. Relative humidity above roughly 80% during application should trigger extra monitoring of the dew point margin.
How to avoid it:
- Measure substrate temperature, air temperature, relative humidity, and dew point with a digital hygrometer-thermometer pair, ideally early morning after a cold night; log all four before every pour.
- Maintain a minimum 3°C (≈5°F) margin between substrate temperature and dew point; if the margin closes, stop work and ventilate or heat the space.
- Respect recoat windows. Most epoxy systems accept the next coat within 12-24 hours at 23°C (73°F); if the window is missed, abrade the cured film to a matte profile and vacuum before coating.
- Plan work in bays sized so that edges never dry before back-rolling, especially in warm, dry conditions that shorten working time.
Field example: a cold-storage loading dock was coated in late autumn without dew point monitoring. The slab was 4°C (39°F) at pour time; the dew point was 3°C (37°F). Within days, a fine condensation layer produced fisheyes across 40% of the floor, and the affected area had to be ground back and recoated at the contractor’s cost. The total rework cost exceeded the monitoring instruments needed to prevent it by a wide margin.
6. Mistake #4: Choosing the Wrong Flooring System – Is the Chemistry Right for the Exposure?
The mistake: specifying a standard epoxy floor for an environment it was never designed for – a commercial kitchen with hot washdowns, a chemical plant with solvent spills, or a warehouse with steel-wheeled traffic. The floor fails not because it was installed badly, but because the wrong chemistry was chosen.
Why it fails: every resinous system has an operating envelope. Standard epoxy is strong and economical but has limited thermal-shock resistance and moderate chemical tolerance. When boiling water is poured on epoxy, or solvent is spilled and left standing, the film stresses, softens, or stains. Urethane cement (also called polyurethane cement) is formulated to absorb thermal shock and resist the aggressive washdown chemistry of food and beverage facilities. Choosing the system is a chemistry decision, and it must be made from the exposure data, not from habit.
The data: the selection logic below is the framework we use in KAIDA PAINT specification engineering for commercial flooring projects.
Resinous flooring system selection by environment
| Environment | Recommended system | Key property |
|---|---|---|
| Retail, showroom, light commercial | Standard epoxy or self-leveling epoxy | Aesthetics, easy cleaning, moderate cost |
| Warehouse and logistics | High-build epoxy or polyurethane | Abrasion resistance, flatness control, joint design |
| Commercial kitchen, brewery, dairy, food plant | Urethane cement over a PU-compatible primer | Thermal-shock resistance, hot-water washdown tolerance |
| Chemical processing, laboratories | Specialist epoxy or polyurethane with verified chemical resistance | Chemical resistance validated against the actual spill list |
| Cold storage, fast-track shutdowns | MMA system | Cures down to -20°C (-4°F), foot traffic in 1-2 hours |
For wet-process facilities, see our complete guide to urethane cement flooring for the full comparison of benefits, uses, cost, and installation.
Not sure which system fits your exposure? Send us your traffic, chemical, and temperature audit and get a recommendation within 24 hours.
How to avoid it: audit the environment before specifying. Write down the traffic (foot, pallet jack, forklift, steel wheel), the chemicals (names and concentrations, not categories), the temperature range (including washdown and steam events), and the moisture story. Then select the system from that list, and validate chemical resistance with the manufacturer’s data rather than assumptions.
Field example: a brewery installed standard epoxy in its keg-washing area because the general contractor “always uses epoxy.” Within one year, thermal cycling and caustic washdowns had cracked and softened the floor around every drain. The replacement urethane cement system, installed at roughly 1.5 times the cost of the failed epoxy, has now served five years without a single repair. The failure was never an installation defect; it was a specification error that no installation technique could have saved.
7. Mistake #5: Opening the Floor to Traffic Before Full Cure – When Is It Really Ready?
The mistake: returning forklifts, pallet jacks, or rolling equipment to the floor as soon as it feels dry, while the resin has reached only a fraction of its final strength.
Why it fails: resin strength develops on a curve, not a switch. A film can be touch-dry in hours but needs days to reach its design tensile and compressive strength. Early traffic stresses the immature film at the interface where it is weakest, producing wheel-mark indentations, scuffing, and micro-damage that accumulates into visible wear. Joints and edges, which cure and stress differently, are the first to fail under premature loading.
The data: cure guidance for epoxy flooring installation is 24-48 hours to light foot traffic and up to 7 days to full chemical and mechanical service at 23°C (73°F). The other systems follow different schedules, so the reopening plan must match the chemistry:
Cure and reopening times by resinous flooring system
| System | Light foot traffic | Full chemical and mechanical service | Best for |
|---|---|---|---|
| Epoxy | 24-48 hours at 23°C (73°F) | Up to 7 days at 23°C (73°F) | Warehouses, retail, standard duty |
| Polyurethane | 24-48 hours | Similar to epoxy; verify with the manufacturer | Areas needing flexibility and UV stability |
| Urethane cement | About 24 hours | Forklift traffic sooner than standard epoxy | Food plants, wet-process facilities |
| MMA | 1-2 hours | Reopens overnight | Cold storage, fast-track shutdowns |
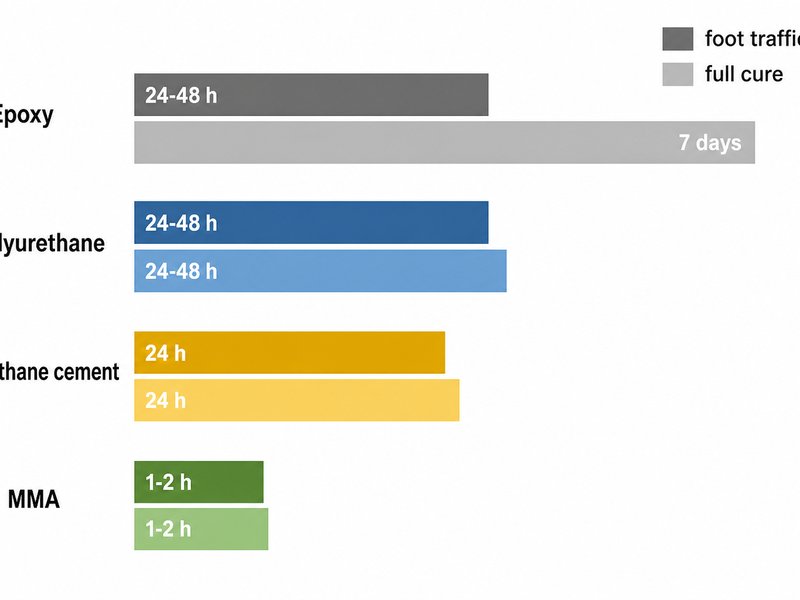
Figure 4. Cure times differ by system chemistry. Match the reopening schedule to the system, and to the actual site temperature, not to the calendar.
The numbers on the label are minimums at ideal conditions. Cold, humid, or thick films cure slower, so match the reopening schedule to the system and to measured site temperature rather than to the calendar.
How to avoid it:
- Publish the cure schedule in the project plan before installation, and protect the floor with barriers or signage during the critical first days.
- Phase the reopening: light foot traffic first, then hand pallet jacks, then forklifts, then steel-wheeled equipment.
- At lower temperatures, extend the schedule proportionally; base the reopening date on measured conditions rather than calendar time.
- Confirm full cure with the manufacturer’s guidance or hardness checks before heavy service, and document the date of reopening.
Field example: in a retail distribution center, management reopened a 2 mm epoxy floor to forklift traffic after 24 hours because the aisles were needed. Within three months, wheel paths showed visible indentations and scuffing across the busiest lanes. The floor had to be topcoated twice in the following two years. In a sister facility where the same system was protected for the full 7 days, the floor shows no wheel-mark damage after the same service period. Identical product, identical traffic; the only difference was the cure schedule.
8. How to Avoid Commercial Flooring Installation Mistakes: The Pre-Installation Checklist
All five commercial flooring installation mistakes are preventable with a single document: the pre-installation checklist below. The checklist is condensed from the QA protocol we run on every KAIDA PAINT project, and it can be adapted to any commercial flooring installation. The same protocol governs epoxy flooring installation, polyurethane floors, and urethane cement systems.
Pre-installation checks
- Run ASTM F2170 moisture testing at 40% slab depth, minimum 72 hours equilibration, and record the RH values. On new slabs, test no earlier than 28 days after placement.
- Check surface pH after preparation: fresh concrete reads pH 12-13; confirm the specified primer tolerates high pH, or neutralize per the primer’s data sheet.
- Mechanically prepare to the ICRI CSP the specified system requires – CSP 2-3 minimum for primers and thin films, CSP 4-5 for 100% solids and self-leveling epoxy – and verify with the ICRI chip kit, not by feel.
- Vacuum with HEPA filtration and re-inspect under raking light for dust, oil, and curing compound residue.
- Repair cracks and control joints with a compatible joint filler before coating; joints telegraph through thin films and fail first under premature loading.
- Measure substrate temperature, air temperature, relative humidity, and dew point with a digital hygrometer-thermometer pair; confirm a minimum 3°C (≈5°F) dew point margin.
During and after installation
- Confirm the specified system matches the traffic, chemical, and washdown exposure audit.
- Confirm the recoat window and working time for the actual conditions; adjust bay sizes accordingly.
- Log mixing ratios, induction times, and application coverage for every batch.
- Publish the cure and reopening schedule, and protect the floor until full service strength.
Documentation is your warranty: ASTM F2170 readings, profile verification, environmental logs, batch records, and the reopening date are the first things a warranty claim asks for. Keep them in the project file from day one.
Each item on this list is a question the installer can answer before the first pour: is the slab dry, is the surface profiled, is the environment in range, is the system right, and is the schedule protected? If the answer to any item is no, the correct move is to stop and fix the condition rather than to proceed and hope.
Get this checklist as a PDF with a free pre-installation review from our specification engineers.
9. FAQ: Commercial Flooring Installation Mistakes Answered
Q: What is the most common mistake in commercial flooring installation? A: Skipping or rushing concrete moisture testing and surface preparation. Failure-analysis literature attributes roughly 80% of premature coating failures to preparation and bonding issues, and both moisture mismanagement and inadequate surface preparation sit squarely in that category.
Q: How long does commercial epoxy flooring take to cure? A: Typically 24-48 hours to light foot traffic and up to 7 days to full chemical and mechanical service at 23°C (73°F). Lower temperatures extend the schedule. MMA systems cure in 1-2 hours, and urethane cement floors usually accept foot traffic in about 24 hours.
Q: Do I need a concrete moisture test before epoxy flooring? A: Yes, on every commercial slab. Run ASTM F2170 in-situ RH testing before scheduling installation. Above 85% RH, standard primers are limited; use a moisture barrier, a breathable system, or a urethane cement floor.
Q: Can a stronger topcoat fix a bad installation? A: No. Adhesion failures, moisture blisters, and thermal-shock cracking are decided by the substrate, the environment, and the system selection. A thicker or harder topcoat does not repair a wet slab or a dusty surface.
Q: What causes bubbles in epoxy floors? A: Three causes dominate: moisture vapor from the slab, air trapped in an unprimed porous surface, and application over a substrate at or below the dew point. All three are prevented before the pour, not after.
Q: How much does commercial flooring installation cost? A: As a planning benchmark on a new-install basis, installed standard epoxy systems typically run 4−4−9 per sq ft depending on preparation scope; urethane cement runs roughly 1.5-2.5 times that; MMA systems cost more but reopen in hours. Regional labor rates vary, so request a quote for your area. One point holds across all systems: the repair of a failed installation typically costs many times the preparation and testing that would have prevented it.
Q: How long should new concrete cure before commercial flooring installation? A: At least 28 days. Run ASTM F2170 in-situ RH testing no earlier than 28 days after placement; earlier readings are not representative of long-term slab moisture.
Q: What is the dew point and why does it matter when installing epoxy flooring? A: The dew point is the temperature at which moisture in the air condenses on surfaces. Keep the substrate at least 3°C (5°F) above the dew point during application and cure, or condensation causes fisheyes, blush, and adhesion loss.
Q: My epoxy floor is delaminating after six months – can it be repaired? A: In most cases, yes: remove the failed film, re-profile the concrete to the ICRI CSP required by the replacement system (CSP 2-3 minimum for primers and thin films; CSP 4-5 for 100% solids and self-leveling epoxy), and recoat with a compatible primer and system. If moisture caused the failure, address it first with a barrier or a urethane cement system.
Q: I’m opening a food production facility – which flooring system should I specify? A: Start with the exposure audit: hot washdowns, caustic and acid cleaning chemicals, and thermal shock at drains. For wet-process areas, urethane cement over a PU-compatible primer is the standard choice; keep standard epoxy for dry support areas.
10. Final Recommendation
The five commercial flooring installation mistakes covered above are documented, measurable, and preventable. They require testing, preparation, environmental control, honest system selection, and a published cure schedule – no exotic technology involved.
Start with the data: test the moisture, profile the concrete, and log the environment. Then select the system from the exposure audit, not from habit, and protect the floor through its full cure. Whether the project is a retail showroom or an industrial epoxy flooring installation in a production hall, the same five rules apply. If you do those five things, the probability of a premature failure drops to a small fraction of the industry average, and the floor reaches the service life its chemistry was designed to deliver.
If you are specifying a new facility or troubleshooting an existing floor, our specification engineers can review your project details – floor area, substrate condition, moisture readings, traffic, and chemical exposure – and recommend a system within 24 hours. For wet-process facilities, pair the recommendation with our urethane cement flooring guide, which covers thermal-shock resistance, cost, and installation thickness in detail.
About KAIDA PAINT and This Guide
KAIDA PAINT is a resinous flooring manufacturer with 15+ years of experience formulating and supplying epoxy, polyurethane, urethane cement, and MMA flooring systems for industrial, commercial, and healthcare projects in 40+ countries, and this guide distills the installation-quality lessons from those project records. Our product range includes solvent-free epoxy primers, moisture-tolerant primers, self-leveling epoxy, high-build urethane cement, polyurethane systems, MMA fast-track systems, and ESD flooring.
Why specifiers choose KAIDA PAINT:
- System-matched chemistry: primers, body coats, and topcoats are formulated in the same R&D program, eliminating the interface guesswork between brands.
- Tested, not assumed: every system is validated with ASTM D4541 pull-off adhesion testing and ISO 2812-1 chemical resistance testing in our laboratories, and our technical documentation includes application and cure guidance matched to real site conditions.
- Technical specification support: our engineering team provides site assessment, moisture testing guidance, system selection from your exposure audit, and CSI-compliant specification packages for projects of any size.
- Warranty with conditions you can meet: we warrant systems installed with the specified products, documented preparation, and recorded environmental conditions, which keeps both sides accountable and honest.
What a client said: “Our plant went from a floor that delaminated within seven months to one that has served five years without a single repair. The difference was testing and preparation.” – Plant engineer, food processing facility (de-identified).
Talk to a specification engineer: send us your project details – floor area, substrate condition, moisture readings if available, traffic, and chemical exposure – and we will respond within 24 hours with a recommended system, coverage estimate, and indicative pricing.


 English
 Spanish
 Portuguese
 Arabic
 French
 Italian
 Russian
 Indonesian
 Swedish