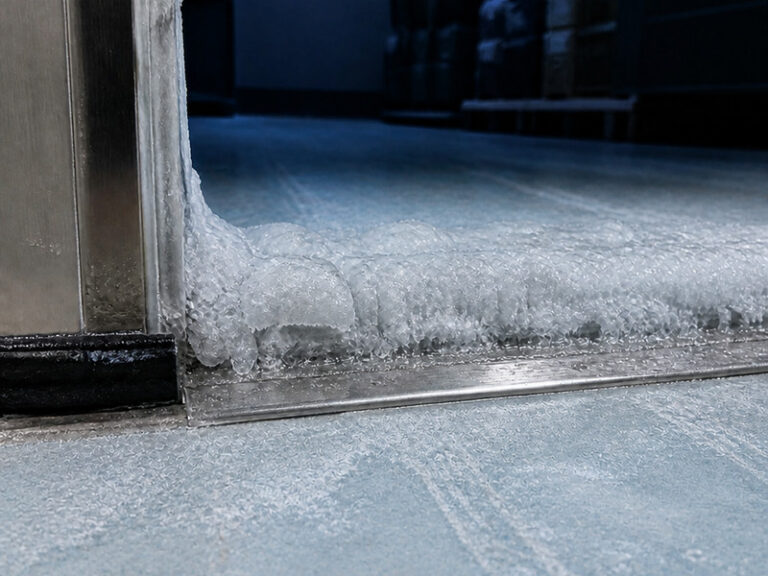
Freezer floor cracking is rarely a coating problem. Water gets under the surface, freezes, expands, and lifts whatever is above it, so the crack you see is the last event in a sequence that started months earlier.
Cold rooms produce that sequence more reliably than any other room in a food plant. The slab is below freezing for years, the door lets in warm humid air several times an hour, and every defrost cycle moves water through the same path.
This article explains where the water comes from, how to read the pattern it leaves, what a repair at sub-zero temperature can and cannot do, and the details that stop the same crack returning after the next refurbishment.
What cracking in a freezer actually is
Three different failures get called the same thing. The resin film can crack on its own, the concrete under it can spall, and the joint between the two can open. Each has a different cause and a different repair.
The first question on site is therefore depth, not width. A crack that stops in the film is a coating issue; one that takes a coin edge at the shoulder is into the substrate, and the cold room floor damage is structural rather than cosmetic.
The second question is timing. A crack that appears in the first winter is a design or installation problem. One that appears in the fifth is usually water finding a new path, which means a detail has changed behaviour.
Answer both before anyone quotes. A freezer floor cracking diagnosis made from a photograph is a guess with an invoice attached, because the same crack line can come from heave, from a joint, or from a cold room floor damage that started at the door. The two questions cost an hour on site and save a season of repeat work. Most freezer floor cracking that gets repaired twice was misdiagnosed the first time, because the visible symptom matched a cause that was not present.
Ice lenses and heave under the slab
An ice lens forms when water migrates through a freezing soil or slab and collects in a layer. It grows upward, lifting the concrete a few millimetres at a time, and the film above it cracks along the line of least resistance.
That mechanism explains the pattern that puzzles maintenance teams: a crack with no traffic on it, in the middle of a bay, running in a straight line. Nothing hit the floor; the floor was pushed.
Under-floor heating, a vapour barrier and a well-drained sub-base are the three defences, and the barrier has to be continuous. A vapour barrier that is lapped but not sealed at a penetration is a path, and a freezer floor cracking that follows a straight line across a room often follows exactly that path. Where any of them is missing, freeze thaw flooring becomes a permanent condition rather than an event, and every surface repair is temporary.
Freeze-thaw at the door and the drain
The door threshold is the busiest detail in a cold store. Warm air arrives every time the door opens, condenses on the coldest surface, and freezes. The ice then melts during cleaning and refreezes overnight.
That cycle is the classic freeze thaw flooring driver, and it is why damage at a threshold often looks worse than damage in the middle of the room. A heated threshold, a proper air curtain and a fall away from the door reduce it, but only if all three work together.
Drains have the same problem in reverse. A drain that holds water at the low point of a freezer will freeze that water, and the expansion lifts the surround. Where the drain is inside the room, the trap needs to be outside it.
Where both a door and a drain are present, the corner between them is where freezer floor cracking usually starts. A door threshold detail that works in a chilled room at 2 °C often fails at minus 25 °C, because the same amount of moisture freezes harder and the ice expands further into the joint. Treat the door threshold as a thermal detail, not a trim item. It is the one place that collects water from two directions and freezes from two directions.
Reading the crack pattern
Straight cracks that follow a line suggest heave or a joint. Cracks that radiate from a point suggest a local load or a frozen drain. Cracks with a hollow ring around them suggest the bond has already gone.
A crack mapping done properly records three things: the direction, the width at three points, and whether the edges are still level. Edges that have lifted mean the slab has moved, not just the film.
Repeat the crack mapping after every repair and at every inspection, and keep the drawings in one file. A crack mapping that is done once tells you what happened; one that is repeated tells you what is happening, which is the difference between a freezer floor cracking programme and a series of emergencies. Photograph the pattern with a scale and a north arrow, then compare it with the door positions and the under-floor heating layout. The comparison usually identifies the driver without opening the floor.
Table 1: Pattern, driver and first check.
| Pattern | Likely driver | First check |
|---|---|---|
| Straight line, no traffic | Heave or ice lens | Slab level against a datum |
| Radiating from a point | Frozen drain or point load | Drain position and fall |
| Crack with hollow ring | Bond loss then movement | Tap test and pull-off |
| Craze across a bay | Film too rigid for the cycle | Build-up and thickness |
Why a repair at minus 20 behaves differently
Every resin reaction slows as temperature falls. At minus 20 °C a standard epoxy does not cure at all, and a polyurethane cures so slowly that it is still soft when the store is reloaded.
A low temperature repair therefore depends on the chemistry, not the crew. MMA systems cure at low temperature because the reaction is initiated rather than catalysed by ambient heat, which is why they dominate emergency work in freezers.
The substrate matters as much. Ice in the pores will stop any bond, so the repair has to include a method for drying the concrete locally, usually a hot-air lance and a moisture reading before the primer goes down.
Crews working in a freezer also work in short shifts, and that shapes the method. A low temperature repair that needs six hours of steady temperature is not practical in a room that has to be reloaded overnight, which is why the fast systems dominate. Where the store cannot be warmed, the honest choice is a small, fast, well-prepared patch rather than a large area applied cold. A cold-applied patch that fails in three weeks costs more than the bay you did not do.
Insulation failure and the warm spot
A cold room floor sits on insulation, and insulation fails quietly. Water enters at a penetration, the thermal performance drops, and a warm spot forms that stays wet when the rest of the floor is frozen.
Nobody looks up in a cold store, which is why insulation failure is usually found late. That warm spot is visible from above as a patch of darker, wetter surface, and from below as condensation on the ceiling of the space underneath. It is the earliest reliable sign of insulation failure, and it is usually missed because nobody looks up.
Thermal imaging is the fastest way to find it. A camera shows the warm patch in seconds, before the surface looks wet, and the image is evidence that insulation failure is present rather than suspected. Where insulation failure is confirmed, a surface repair buys months. The water will keep arriving from the same place, and the freezer floor cracking will return along the same line. The permanent fix is a local rebuild of the insulated build-up.
Spalling, delamination and the difference that matters
Spalling is concrete leaving the surface, usually in a shallow dish with a defined edge. It happens when water freezes just below the surface and pushes a plate of concrete off, and it is a substrate failure.
Delamination is the film leaving the concrete. The two look similar in a photograph and behave differently in a repair: spalling needs a mortar repair before any resin, while delamination needs the film cut back to sound material.
Test before deciding. Tap the area, then take a core or a pull-off. A repair that treats spalling as delamination will re-bond to a surface that is already leaving, and the cold room floor damage will reappear within a season.
Table 2: Symptom, test and repair.
| Symptom | Test | Repair |
|---|---|---|
| Shallow dish with an edge | Core or hammer sounding | Mortar repair, then resin |
| Hollow film, sound concrete | Pull-off | Cut back, re-prime, re-lay |
| Crack with lifted edges | Straightedge and level | Local rebuild of the build-up |
| Wet patch that will not freeze | Thermal image | Insulation repair, not resin |
Repair routes: local, bay or full rebuild
A local repair is right where the cause is local: a frozen drain, a damaged threshold, a single ice lens under one bay. Cut back 100 mm beyond the defect, prepare the concrete, and rebuild the detail, not just the surface.
A bay repair is right where the pattern repeats across the bay but the slab is sound. It costs a shift and a half, and it is the point at which most plants discover that the insulation is the real problem.
Whichever route is chosen, the slab has to be dry before the primer. That is the one rule that separates a freeze thaw flooring repair that lasts from one that fails in the first defrost, and it is the step most often shortened when a store is empty and the pressure is on. A full rebuild is right where heave has lifted the slab, where insulation has failed across the room, or where the third local repair in five years is being planned. At that stage the freezer floor cracking is a symptom of the build-up, not of the film.
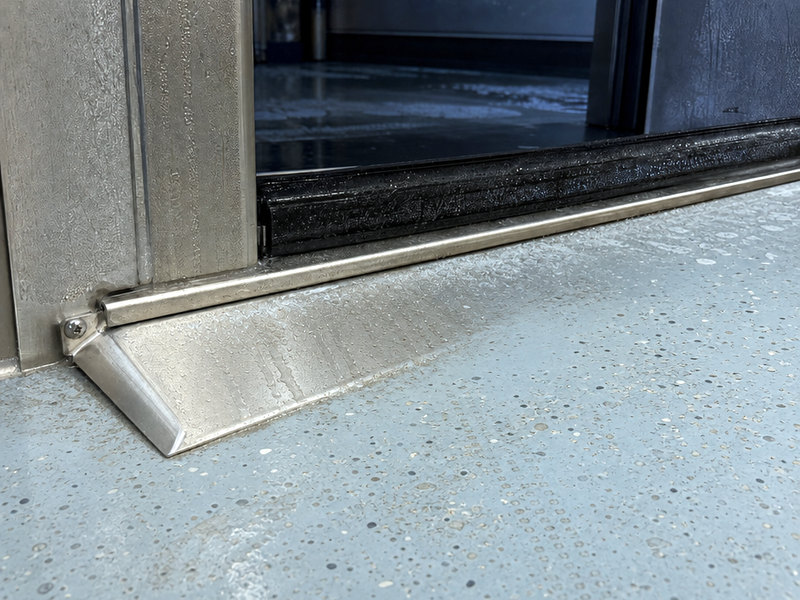
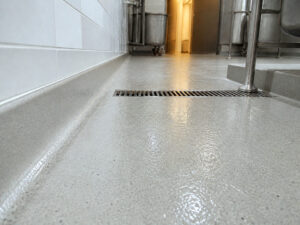
Figure 1: The threshold is where warm air arrives and where most freeze-thaw damage begins.
Specifying a freezer floor that does not repeat
Start with the thermal design: insulation, vapour barrier, under-floor heating or a heated threshold, and a drain outside the room. A resin specification cannot compensate for any of these being absent.
Then specify the system by temperature and by cure method, not by family name. A low temperature repair system has to be named as such in the document, with the minimum application temperature and the test that proves the cure.
Finally, require the details at 1:5 for the threshold, the drain and every penetration, and require the installer to record the substrate moisture before the primer. Those three drawings and one number prevent most freezer floor cracking. Keep the drawings with the handover file as well, because the next refurbishment will start from them, and a second low temperature repair in the same room is much cheaper when the build-up is already documented.
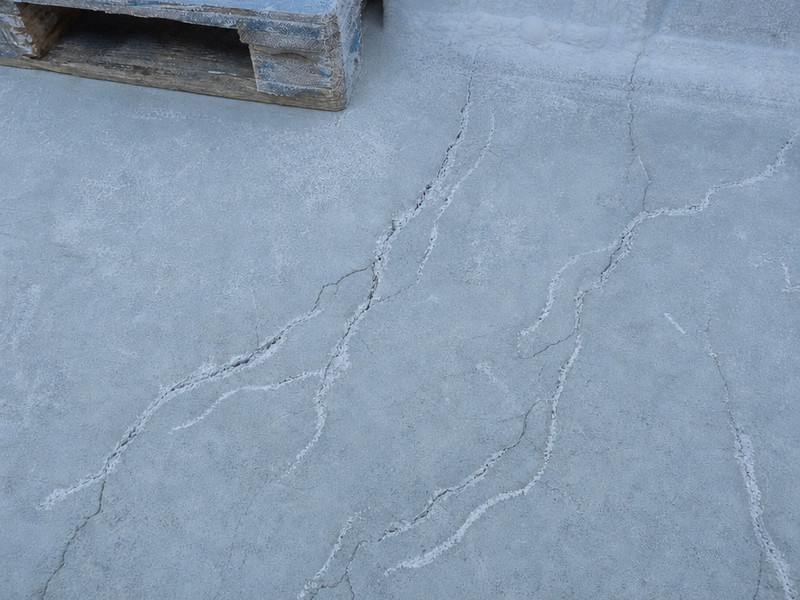
Figure 2: A crack map with directions and widths is the cheapest diagnostic tool in a cold store.
Table 3: What to put in the specification.
| Objet | Value to state |
|---|---|
| Service temperature | Room temperature and the coldest surface |
| Cure method | Low-temperature system, minimum application temperature |
| Threshold | Heated, with the fall away from the door |
| Drain | Outside the room, or trapped and heated |
Frequently asked questions
Can a freezer floor be repaired without emptying the room?
Yes, where the repair is small and the system cures at low temperature. An MMA patch at minus 20 °C can be walked on within a couple of hours. The constraint is preparation: ice in the pores has to be removed and the concrete dried locally before any primer.
Why does the crack come back in the same place?
Because the water that caused it is still arriving. A repaired crack in a freezer is usually a repaired symptom; if the insulation under that spot has failed, or the drain still holds water, the same ice lens reforms and lifts the same area.
How do I tell heave from a coating crack?
Put a straightedge across the crack and look for lift on both sides, then check the slab level against a datum elsewhere in the room. Heave moves the slab; a coating crack leaves the slab where it was. A straightedge across the crack and a level reading at both ends settles the question in five minutes.
Is a thicker resin the answer to freeze-thaw damage?
No. Thickness helps with thermal shock from washdown, not with water freezing underneath. Where the water source is not removed, a thicker film simply lifts in larger pieces.
What temperature can a low-temperature system be applied at?
A few MMA and specialist polyurethane systems can be installed at about minus 20 °C. That is a construction window, not a service limit: the service temperature is set by the system you choose, and the number has to come from the product data sheet. The cure still has to be verified on site with a hardness reading rather than assumed from the calendar.
Does a cold room need a different slip resistance?
Usually a lower class than a wet process room, because the floor is dry and ice is the hazard rather than water. Where ice is expected at a door, the threshold detail matters more than the class in the field.
How often should a freezer floor be inspected?
Twice a year is a reasonable baseline, plus a check after any defrost fault or door failure. The inspection should record crack widths against the previous reading, because movement between readings is the signal that matters. Keep those widths in millimetres on the same drawing, so the next inspection is a comparison rather than a new survey.
Why food plants work with Kaida Paint
Kaida Paint supplies low-temperature MMA, polyurethane and uréthane à base de ciment systems for cold stores, and we will tell you when the floor is not the problem. Send a plan with the door and drain positions, the room temperature and the defrost routine, and we will return a build-up with the threshold detail drawn. Where freezer floor cracking has already started, a crack map and two photographs are usually enough for us to say whether the next step is a patch or a rebuild.




 English
 Spanish
 Portuguese
 Arabic
 French
 Italian
 Russian
 Indonesian
 Swedish