
A flooring audit checklist is a walk with a pen, not a report. Twenty-five points, five zones, one page, and a decision for every point: repair now, schedule, or record and monitor.
The purpose is to find what an auditor would find, before the auditor finds it. A defect that is known, dated and scheduled is a managed risk; the same defect discovered during the audit walk is a finding.
A flooring audit checklist should take about ninety minutes in a mid-sized plant, and it can be done by one person with a torch and a plan.
This checklist covers surface condition, joints and coving, drainage, slip and records, and ends with a scoring method that tells you where the next maintenance budget should go.
How to use this checklist
Walk the plant with a plan in hand and number the locations on it. Every point on this list is answered at a location, and a point without a location cannot be scheduled or verified.
Take photographs with a scale in frame. A flooring audit checklist that produces ten photographs with grid references is worth more than a page of adjectives, and it takes about the same time.
Score each point as pass, monitor or fail. Pass means the condition and the document exist; monitor means the condition is acceptable with a review date; fail means it needs a repair and a date.
A food safety audit floor walk should start where the last finding was raised, because that is where the auditor will start. Bring the previous report and the current repair register to the same page, so a repeat defect is visible as a repeat.
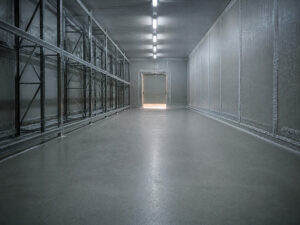
A food safety audit floor should also cover the floor outside the production door, because that is where boots arrive wet and where the first slip of a shift usually happens. A flooring audit checklist in a cold store needs the door threshold checked as well, since ice hides a defect until the spring thaw.
Do the walk in production, not on a quiet Sunday. A food safety audit floor is judged under working conditions, and a floor that looks acceptable when dry can fail when wet.

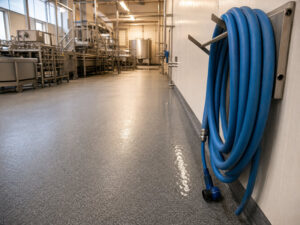
Figure 1: One page, one plan, one pen. The walk is the audit; the report is only the record of it.
Zone 1: surface condition (points 1-6)
The first zone is the field floor: what the traffic sees, and what the cleaning touches. Six points cover most of it, and a flooring audit checklist that stops after this zone will miss the details that generate findings.
- 1. Chips and spalls at doorways, plinths and traffic lanes.
- 2. Cracks longer than 100 mm, with their locations marked on the plan.
- 3. Worn lanes where the aggregate is visible or the surface has polished.
- 4. Staining that survives cleaning, which usually means porosity or a joint.
- 5. Soft or tacky patches, which point to chemical attack or incomplete cure.
- 6. Patch repairs from previous years, and whether they are still bonded.
Table 1: Defect bands, and the response each one triggers at the walk.
| Band | Typical defect | Response |
|---|---|---|
| Under 20 mm | Chip, pinhole, sealant gap | Record, seal at next clean |
| 20-100 mm | Crack, worn patch, lifted cove | Schedule within the quarter |
| Over 100 mm | Delamination, ponding, open joint | Contain, then repair in the next window |
Work with a torch held low and at an angle rather than overhead. Raking light shows a lifted edge, a hollow patch and a film of residue that a vertical view hides, and it costs nothing but a change of posture.
Record each defect with a size. A 20 mm chip and a 200 mm delaminated patch are not the same finding, and the response differs: the first is a repair register entry, the second is a repair scope. Carry a tape and a torch, and write the size on the photograph, because a picture without a scale is an opinion rather than a record an auditor can use.
Zone 2: joints, coving and penetrations (points 7-12)
This zone produces more findings than any other, because it is where cleaning cannot reach and where water collects. The points below are the ones an auditor photographs.
- 7. Cove radius at every wall junction, and whether it is continuous.
- 8. Sealant at the top of the cove: colour, adhesion and mould.
- 9. Penetrations for pipes and legs, sealed or open.
- 10. Door thresholds and the junction to the frame.
- 11. Kerbs at wall bases and whether they are intact.
- 12. Joints between different floor systems, and whether they are sealed.
This is also where audit evidence is easiest to build. A photograph of every cove, dated, is the strongest single record a plant can hold for the junction an auditor always inspects.
A coved junction check is not only about the radius: the sealant at the top of the cove is part of the same junction and fails first. Where the check finds shadowing at the base, the cove has lifted and water is already behind it. That is a repair, not a cleaning instruction.
A coved junction check takes two minutes per room with a torch and a mirror, and the same mirror shows whether a pipe penetration has been sealed or simply cut. Do it before the washdown, when the shadow line at the base of a lifted cove is still visible, and again after, when the water shows which way the fall runs.

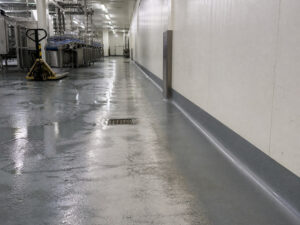
Figure 2: The top of the cove is where sealant fails first. A torch and a mirror find it in seconds.
Zone 3: drainage and falls (points 13-17)
The junction details also decide how much of the audit evidence is visual and how much is documentary. A photograph of a sound cove with a date is worth more than a paragraph describing it.
Drainage findings are usually about water that stays, and the cause is a fall that was never built rather than a drain that is blocked. Five points cover the drain condition.
- 13. Standing water 30 minutes after washdown, photographed.
- 14. Drain covers and frames: secure, flush, and free of broken bars.
- 15. Collars around outlets, formed or cut in, and whether they are sealed.
- 16. Fall to the outlet, checked with a level at the low point.
- 17. Odour at drains, which points to a trap or a solids problem.
Drain condition is worth photographing from two angles: the cover and the collar. The first shows blockage and broken bars, the second shows whether water is reaching the outlet or sitting beside it.
Ponding is the most useful defect a hygiene inspection floor walk can find, because it explains slip incidents, bacterial growth and coating failure in one observation.
Zone 4: slip and traffic (points 18-21)
Slip is judged by observation and by record, not by instrument. These four points connect what the floor looks like to what the specification asked for.
- 18. Profile depth in the wet areas, measured or compared with a reference sample.
- 19. Film or residue after cleaning, which reduces grip without visible damage.
- 20. Ramps, steps and thresholds, where the class should be higher than the field.
- 21. Incident log for slips in the last twelve months, with locations marked.
The slip check on any hygiene inspection floor should include the film test: wipe a dry hand across the surface after cleaning and look at the palm. A grey or tacky film means the detergent is leaving residue, which drops grip without any visible wear.
If point 21 has entries and point 18 shows a polished lane, the answer is a local treatment rather than a whole-floor replacement. A flooring audit checklist should point to the cheapest fix that addresses the cause.
Zone 5: records and evidence (points 22-25)
The last zone is the file. It is the cheapest zone to fix and the one that most often turns a minor defect into a major finding.
- 22. Condition log with dates, locations and decisions.
- 23. Repair history with specifications and photographs.
- 24. Test reports a handover should include: adhesion, thickness, slip, and any ATP swab results used for cleaning validation.
- 25. Specification per hygiene zone, current and signed.
Where cleaning is in question, an ATP swab result converts an opinion into a number. Take it after the shift clean at three fixed locations, and keep the readings with the log.
An audit evidence pack can be short and still convert a defect into a managed item on the day it is found.
Table 2: The evidence that closes each record point.
| Point | Evidence | Frequency |
|---|---|---|
| Condition log | Dated entries with grid references | Monthly |
| Repair history | Before and after photographs, batch | Per repair |
| Test reports | Adhesion, thickness, slip, swab results | At handover and after repairs |
| Spécifications | System per zone, current version | On change |
Scoring and prioritising the findings
Score each fail as high, medium or low. High means a risk to product or to safety today; medium means a defect that will grow within a year; low means cosmetic or documentation.
Table 3: The 25 points scored by zone, one point per point answered.
| Zone | Points | Score |
|---|---|---|
| Surface condition | 1-6 | 6 |
| Joints, coving and penetrations | 7-12 | 6 |
| Drainage and falls | 13-17 | 5 |
| Slip and traffic | 18-21 | 4 |
| Records and evidence | 22-25 | 4 |
Table 3 converts the 25 points into a zone score, and zone outranks count. A single high finding in a high-care area outranks ten low findings in a dry store, and a crack mapping that shows a crack growing under a drain is worth more attention than a chipped tile in an office.
A crack mapping is the exception to ranking by zone. A crack that is widening under a drain outranks almost everything else, because it is the one defect that gets structurally worse while it waits.
A crack mapping is also the cheapest way to show progress between audits. Two dated crack maps, six months apart, tell an auditor more than any statement about maintenance culture.
Where a point fails because the record is missing rather than the floor, fix the record first. A repair register that lists dates without a decision is a diary, not evidence.
Table 4: Priority matrix for a flooring audit checklist.
| Severity | High-care zone | Low-care zone |
|---|---|---|
| Haut | Repair before next production run | Contain and schedule within a month |
| Moyen | Schedule within the quarter | Monitor with a review date |
| Faible | Record and include in the next shutdown | Record only |
What to fix before the auditor arrives
Fix the cheap items first: records, sealant, drain covers, and any ponding that can be cleared by cleaning rather than by rebuilding. Those four cover a large share of the findings a hygiene inspection floor produces.
A hygiene inspection floor walk is also the moment to check the route itself: corridors, changing areas and stores are part of what an auditor sees, and a defect there is as visible as one on the line.
Then contain the expensive ones. A floor defect that cannot be repaired before the audit needs a barrier, a cleaning instruction and a dated plan, and all three should be in the file, not in someone’s head.
Where a crack mapping shows a crack that is widening, the question is repair or replace a resin floor rather than which coating to use. A repair over a moving joint fails again, and the second failure is harder to explain.
A repair register entry that says ‘monitor’ needs a review date, or it becomes permanent by default. The same applies to a cracked drain condition surround: monitoring without a trigger is how a small defect reaches the shutdown window as an emergency.
Finally, walk the route the auditor will walk. The same corridor, the same doorways, the same drains: a flooring audit checklist done on that route finds what the audit would find, in the order it would be found.
Keep the completed checklist, and keep the photographs with it. A coved junction check recorded once is a snapshot; the same check recorded every quarter is a managed junction.
Keep the completed checklist. It becomes the baseline for the next walk, and a series of dated checklists is the strongest evidence a plant can hold that the floor is monitored.
Frequently asked questions
How many points should a flooring audit checklist have?
Twenty-five is enough to cover surface, joints, drainage, slip and records without turning the walk into a project. More points add detail, not coverage.
Who should do the walk?
Someone who knows the floor and someone who does not. The first sees the change since last month; the second sees what a visitor would photograph.
How often should the checklist be used?
Monthly for a working log, quarterly as a minimum for the record. The frequency should match the hygiene zone and the audit cycle.
What is the most common finding on a pre-audit walk?
Clean and re-gun the head joint within the week and log the batch. A bead re-gunned without cleaning the flanks fails at the next wash, and ponding is the other repeat item.
Do I need instruments for this checklist?
A torch, a mirror, a level and a tape are enough. An ATP swab is useful where cleaning is in question, but the checklist works without one.
How do I record a defect I cannot repair before the audit?
Log it with a date, a photograph and a decision: barrier, cleaning instruction and a scheduled repair. That is a managed risk rather than an open finding.
Should the checklist include the whole plant or only production?
Production first, then the routes that support it: corridors, changing areas, stores. Auditors walk the route, and the route includes more than the line.
Why food plants work with Kaida Paint
Kaida Paint manufactures epoxy, polyurethane, cementitious urethane and MMA systems for food and beverage plants, and supplies them as finished systems or as OEM and private-label production for distributors. Each batch ships with a certificate of analysis and a batch record, and TDS and SDS documents are issued in the buyer’s language. If a flooring audit checklist has produced a list of defects, our technical team will price the repairs by zone and tell you which ones can wait for the next shutdown without changing the grade.
Send the completed checklist and the plan, and the reply ranks the repairs by risk with a scope for each.



 English
 Spanish
 Portuguese
 Arabic
 French
 Italian
 Russian
 Indonesian
 Swedish