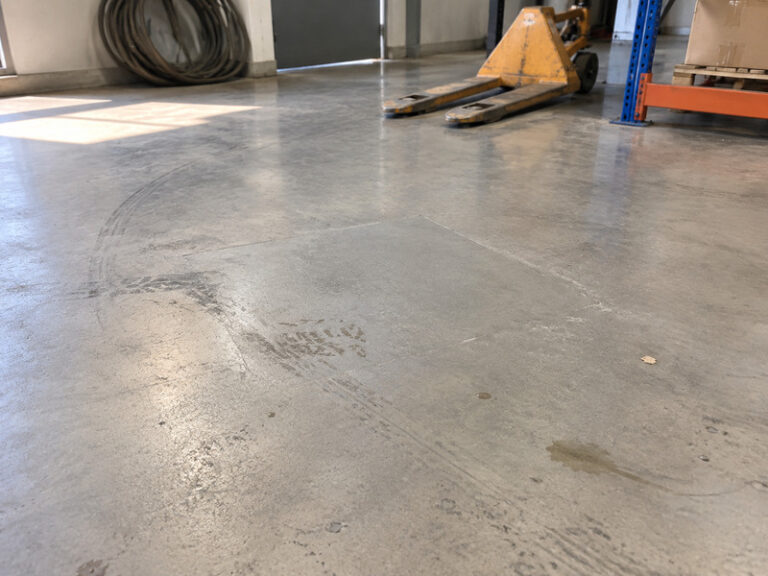
A urethane cement repair is either a patch or a crack treatment, and the two are different jobs with different materials and different edges.
The distinction sounds academic until you meet a floor where a crack filler has been used to fill a spall. The material shrinks, the hole reappears, and the client concludes that urethane cement repair does not work.
A patch replaces lost material in an area. A crack treatment restores continuity across a line.
A urethane cement repair that is specified as a product rather than as a method will be priced as a product, and it will be done as quickly as a product allows.
Confusing the two is why so many repairs fail within a season, and why a floor that was repaired twice ends up being replaced.
This article sets out where each applies, how to prepare the edge, and what a repair has to achieve to last as long as the floor around it.
The short answer
Where material is missing, use a repair mortar and cut a square edge.
Where a crack is present and the material is intact, use a flexible filler and treat it as a joint.
Cut the edge square; a feathered repair lifts at the thin edge.
Fill a moving crack with a flexible filler; a rigid fill reopens on the same line.
Every urethane cement repair we have been called to inspect fell into one of two categories: a patch without an edge, or a crack without movement allowance.
Those four rules come from the same inspections, and they cover both categories.
What a repair has to achieve
A repair has to restore three things: thickness, continuity and appearance.
That is also why a patch edge matters more than the material inside it. The edge is where traffic meets the repair, and it is where the failure starts.
Thickness matters because a repair that is thinner than the floor wears through first and becomes a permanent low spot.
Continuity matters because a repair that is not bonded is a patch sitting on a floor, and water will find the edge.
Appearance matters because a visible repair is a question at every audit, even when it is structurally sound.
A urethane cement repair that restores thickness but not continuity looks correct for a season and then lifts at the perimeter.
A repair that achieves two out of three is a repair that will be revisited.
Spall depth decides the method
A shallow spall, under 5 mm deep, is a coating repair rather than a mortar repair.
A spall deeper than about 5 mm needs a mortar, because a coating cannot fill a void without shrinking or cracking.
A spall that reaches the substrate needs a primer and a mortar, and the substrate has to be sound.
Spall depth is easy to measure with a rule and a straight edge, and it is the number that decides whether a coating or a mortar is ordered.
Where the depth is variable across the repair, the deepest point decides the material rather than the average, and a reading taken at the center of a hole is usually the deepest one.
Measure the spall depth at three points before choosing the product.
Square cut rather than feathered
A feathered repair is a guarantee of a second visit, even when the material inside the patch is correct.
It tapers to nothing at the edge, so there is no thickness to resist traffic and the thin lip is hard to see until it has already lifted.
The edge lifts first at the thin end, and once it lifts water gets under the repair and the failure spreads inward.
A square cut gives the repair a vertical edge with full thickness, and it gives the material something to key against.
A patch edge that is cut square also gives a trowel something to work against, which is why a square patch finishes flatter than a ragged one.
The cut is made with a grinder or a chisel to a depth of at least the floor thickness, and the edge is then undercut slightly.
That undercut is what holds the patch in place mechanically as well as chemically.
Bond coat and surface preparation
A repair needs a primer on the prepared edge and base, applied just before the mortar.
The bond coat is usually a resin primer, and it should be tacky rather than cured when the mortar goes in.
Preparation is the same as for a full floor: the surface has to be clean, sound and keyed.
A patch edge that is dusty is a patch edge that will lift, and the dust is usually created by the cutting operation itself.
Dust on the edge is the most common cause of a patch that lifts in one piece, because the bond coat sticks to the dust rather than the floor.
Vacuum the cut, then prime, then place, in that order and without a break.
Crack filler and when a crack is a joint
A crack filler that is rigid in a moving crack will fail in the first temperature cycle, and the crack will reopen along exactly the same line.
A crack that is still moving is a joint, and it should be treated as one.
That means a flexible filler, a routed groove and a bond breaker at the base, so the filler can move without tearing.
The part clients skip is the diagnosis. Filling a stable crack is a five-minute job; finding out why it cracked is the work.
A crack that has stopped moving can be filled rigidly, provided the cause has been addressed.
Where the cause is a slab joint, filling the crack without carrying the joint through is a temporary repair at best.
The test for movement is simple: monitor the crack width over a season, or ask whether the slab has a joint at that line.
Cure window and reopening
A repair in a live plant has a curing period, and the window is shorter than a full floor pour.
Most repair mortars can be walked on within four to eight hours at 20 C and returned to light traffic the next day.
Resistência química, as always, takes about seven days, which matters in a washdown area.
Where a repair has to be returned to washdown immediately, the options are a faster product or a temporary cover.
The cure window should be written on the repair record, because it is the first thing forgotten.
Color match and batch
Color match is the reason a repair kit from the original batch is worth keeping, and the reason a client should ask for one at handover.
A repair in a different batch will not match, and in a light color the difference is obvious from across the room.
Keep a repair kit from the original batch, stored in the dark and above freezing, and use it for the first few years.
A color match that is close but not exact is usually acceptable in a mid-tone and never acceptable in white.
Where the original batch is gone, a small test patch will show whether the current batch is close enough.
In a dark color the mismatch is usually acceptable; in white or pale gray it is not.
Color is the reason clients ask for a repair and then complain about the result.
Small repairs in a live plant
Three constraints decide how a repair is sequenced: dust, access and time.
Dust is controlled with extraction on the grinder and a screen around the area, and it is the item that matters most in a food plant.
Access determines the sequence, because the repair cannot block a route that production needs.
Time determines the product, because a repair that needs two days cannot be done in a four-hour window.
A repair with a defined cure window can be scheduled into a shift change, and one without it becomes an overnight job that nobody planned.
Every urethane cement repair in a traffic lane should be cut square, cured and recorded before the area returns to service.
Plan the repair as a small project with its own method statement, rather than as a favor squeezed between shifts.
The failures below are the ones we are called back to see, and each of them traces to a step in that sequence.
What a failed repair looks like
A failed patch lifts at the feathered edge, usually within a few months, and the underside is dusty.
A failed crack treatment has cracked again along the same line, often slightly offset.
A failed color match is visible immediately and never improves.
A failed bond shows as a hollow note under a tap, and it can be detected before it lifts.
Each failure has a different cause, and none of them is the material.
Table 1: Patch or filler, by defect.
| Defect | Treatment |
|---|---|
| Shallow spall, under 5 mm | Coating repair |
| Deep spall | Repair mortar, square cut |
| Spall to substrate | Primer plus mortar |
| Moving crack | Flexible filler, routed |
| Stable crack | Rigid fill, cause addressed |
| Lifted patch | Cut out and rebuild |
Sequence for a patch that lasts
Cut the edge square to full depth, and undercut it slightly.
Break out the loose material and check the base for soundness.
Clean the edge and base with a grinder and a vacuum.
Apply the bond coat to the edge and the base.
Place the mortar, compact it and trowel it level with the surrounding floor.
Leave it slightly proud rather than slightly low, because a low patch becomes a puddle that never dries.
Cure it for the stated period before traffic, and for the full period before any washdown reaches it.
Sequence for a crack treatment
Determine whether the crack is moving, and record the width.
Route the crack to a uniform width and depth, and clean it out.
Insert a bond breaker at the base if the filler is to remain flexible.
Apply a primer if the system requires one.
Fill in one pass, slightly proud, and tool the surface to match the floor.
Check the surface after cure for a hollow or a shrink line.
Record the repair with its location and date.
Table 2: Sequence compared.
| Passo | Patch | Crack |
|---|---|---|
| Preparação | Square cut, undercut | Route and clean |
| Bond | Primer on edge and base | Primer if required |
| Material | Repair mortar | Flexible filler |
| Acabamento | Level, slightly proud | Tooled to match |
| Return | Light traffic next day | Immediate, light |
A crack treatment is only as good as the record that follows it, because the next crack on the same line is a question about the last repair.
What to record
A repair record should carry the date, the location, the material and the batch, and a photograph before and after.
That record is what an auditor asks for when a patch is found, and it is what a client needs when a second repair is proposed.
It is also the only way to see a pattern: three repairs in the same lane are telling you something about traffic rather than about the material.
A urethane cement repair that is documented is a repair that can be repeated. A plant that repairs the same spot three times in two years has spent more on labor than a new detail would have cost. That comparison is worth making before the third visit, and the record is what makes it possible.
Keep the record with the floor file rather than in a contractor’s folder.
Table 3: Repair record fields.
| Field | Example |
|---|---|
| Date | 14 March 2026 |
| Localização | Bay 4, at drain 2 |
| Material and batch | Repair mortar, batch 4471 |
| Método | Square cut, primed, troweled |
| Photographs | Before and after, same angle |
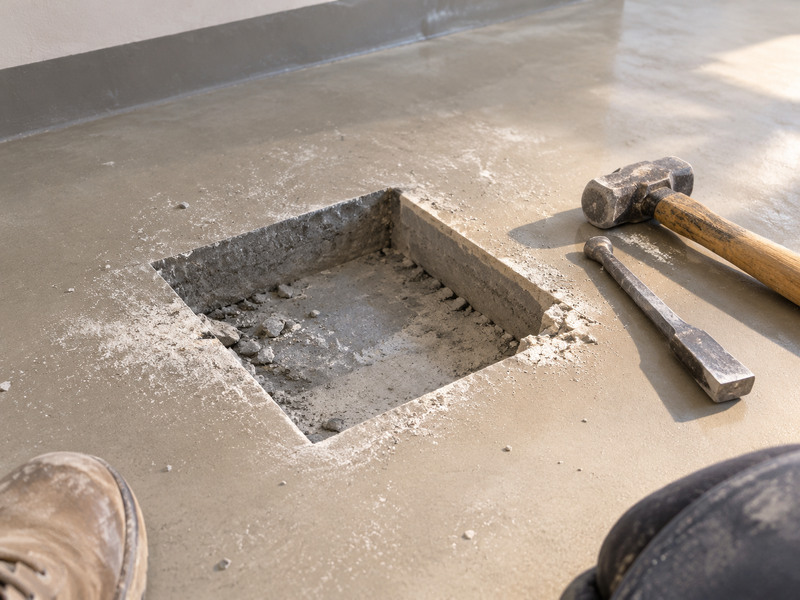
Figure 1: a square-cut patch recess cut into a sealed floor, with the mortar exposed.
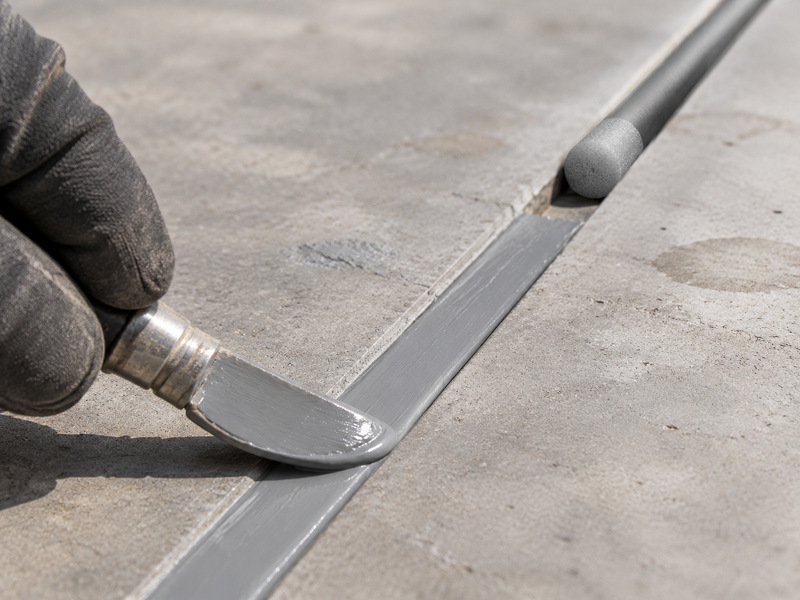
Figure 2: sealant worked into a saw-cut joint, with the backing rod visible at the open end.
Why repairs cluster in the same places
Repairs rarely spread evenly across a floor. They cluster at drains, thresholds, machine feet and the turning points of traffic lanes.
That pattern is useful, because it tells you where the next repair will be and what caused the last one.
Where three repairs appear in the same square meter over two years, the cause is usually a detail rather than the material: a drain flange that flexes, a threshold that is too thin, or a machine foot that concentrates load.
Repairing the floor without addressing the detail produces a fourth repair, and each one is smaller than the last because the surrounding floor is being consumed.
The same logic applies to a spall that keeps returning in the same place. Either the substrate beneath is unsound, or water is arriving from somewhere the repair cannot see.
A repair record with photographs is what makes that pattern visible, and it is the cheapest diagnostic a plant can keep.
Perguntas frequentes
Can a urethane cement floor be repaired?
Yes. A patch with a square edge and a bond coat will last as long as the surrounding floor if the preparation is right.
Why does a feathered repair fail?
Because a tapering edge has no thickness to resist traffic, so it lifts first and lets water under the repair.
Can I fill a crack with repair mortar?
Only if the crack has stopped moving and the cause has been addressed. A moving crack needs a flexible filler.
How soon can a repair take traffic?
Light foot traffic in four to eight hours at 20 C, and chemical resistance after about seven days.
Will the repair match the color?
Only with the same batch, or a close one. In pale colors a different batch is visible from across the room.
Can a repair be done during production?
Yes, with extraction, a screen and a short cure window. It is planned work rather than a favor between shifts.
How do I know a repair has failed before it lifts?
Tap it. A hollow note under the patch means the bond has gone, and the repair can be redone before it spreads.
Kaida Paint supplies repair mortar and flexible filler as a matched system and keeps batch records so a patch can match the original floor. Send a photograph and the floor date, and we will say whether the repair needs a mortar or a filler.



 English
 Spanish
 Portuguese
 Arabic
 French
 Italian
 Russian
 Indonesian
 Swedish