Deskripsi
Kit Lantai Garasi Pelapis Epoksi DIY Terbaik - Hasil Profesional, Dibuat Sederhana
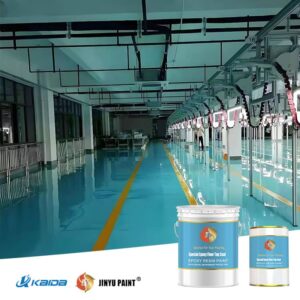
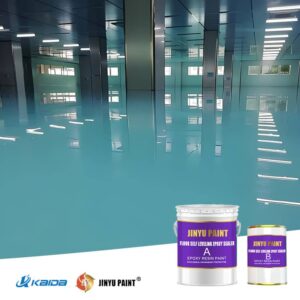
Bosan dengan beton yang bernoda, retak, atau kusam? Kami lantai garasi pelapis epoksi padat tinggi dirancang untuk para DIYer yang tidak mau berkompromi dengan kualitas. Dengan semua yang Anda butuhkan dalam satu kit lengkap-primer, epoksi, serpihan opsional, dan lapisan atas-Anda dapat memperoleh hasil akhir berkualitas showroom yang tahan terhadap minyak, bahan kimia, dan lalu lintas yang padat.
Mengapa Harus Puas dengan yang Lebih Sedikit?
Tidak seperti merek toko perangkat keras yang diencerkan, kit lantai garasi epoksi kami mengandung padatan 93% menurut beratnya-menghasilkan lapisan yang lebih tebal dan lebih tahan lama yang tidak akan pecah atau terkelupas. Dan ya-setiap kit sudah termasuk primer. Karena ilmu pengetahuan tidak berbohong: lantai yang dipoles lebih tahan lama.
✅ Kit Termasuk Primer, Epoksi, Serpihan (Opsional) & Topcoat
✅ Hasil Akhir Tahan UV & Tahan Bahan Kimia
✅ Aplikasi DIY yang Mudah Dengan Hasil yang Pro-Grade
✅ Tersedia dalam 18 Warna + 11 Campuran Serpihan
Pilih Kit Lantai Epoxy Garasi Sempurna Anda
Kami menawarkan konfigurasi kit yang fleksibel agar sesuai dengan visi dan ukuran garasi Anda. Semua kit termasuk penutup rol, mixer, kuas, ember, dan sarung tangan.
| Jenis Kit | Cakupan | Termasuk | Terbaik untuk |
|---|---|---|---|
| Kit Epoksi (Tanpa Serpihan) | 250 atau 500 meter persegi. | Primer + Epoksi + Alat | Hasil akhir yang minimalis dan berwarna solid |
| Kit Epoksi dengan Flake & Topcoat | 250 atau 500 meter persegi. | Primer + Epoksi + 2,5-5 lbs Flake + Mantel atas | Menambahkan tekstur & ketahanan terhadap slip |
| Siaran Penuh dengan Topcoat | 250 atau 500 meter persegi. | Primer + Epoksi + Serpihan 40-80 lbs + 2 Mantel Atas | Cakupan serpihan yang tebal + daya tahan maksimum |
Tidak yakin kit mana yang tepat untuk proyek epoksi lantai garasi Anda?
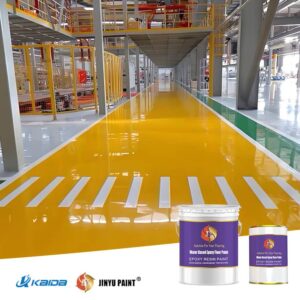
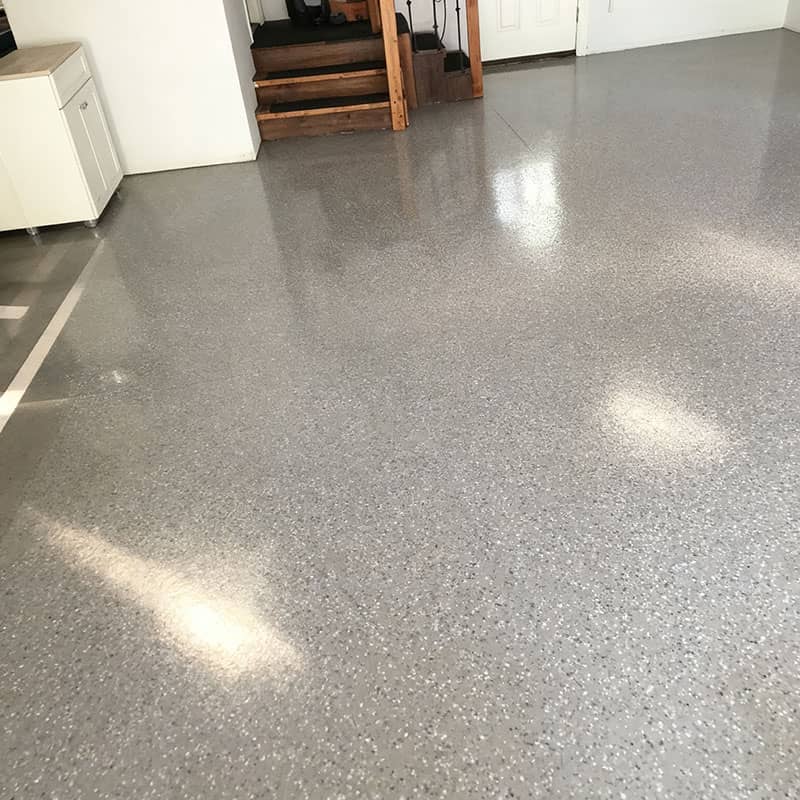
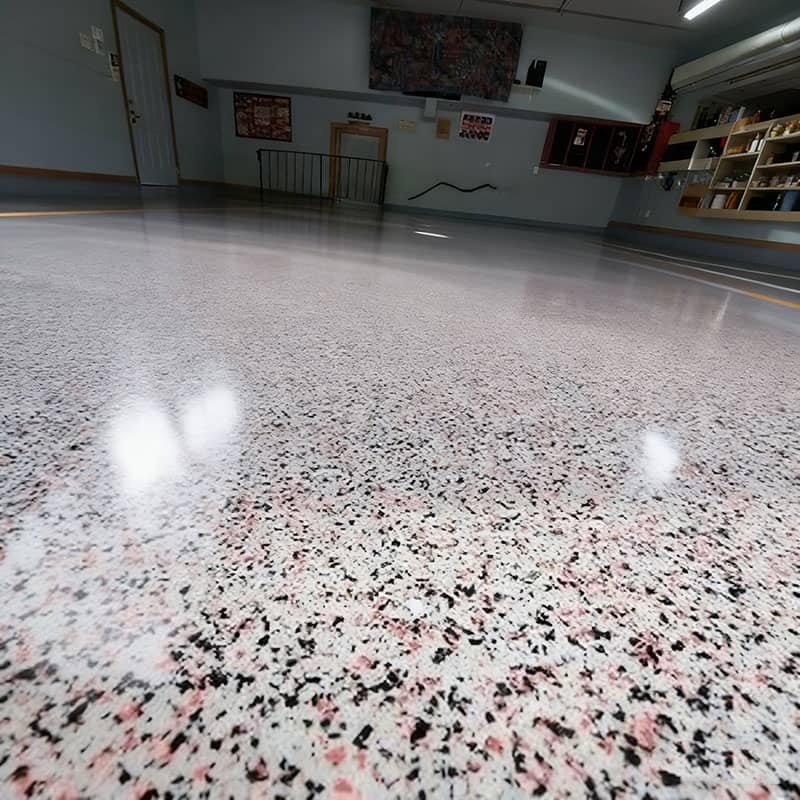
Sesuaikan Lantai Epoksi Anda: Warna & Serpihan
Warna Dasar (18 Pilihan)
Ubin Merah | Abu-abu Muda | Abu-abu Arang | Putih | Hitam | Biru Muda | Hijau | Coklat | Dan banyak lagi
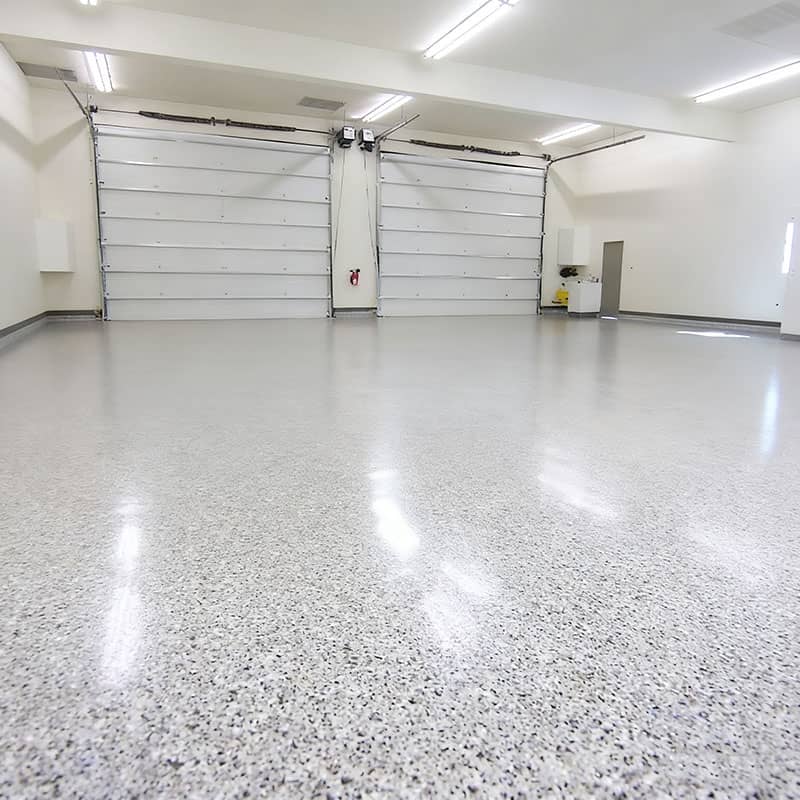
Campuran serpihan (¼")
Domino #1 | Malam Hari #3 | Gelombang Pasang #7 | Pedalaman #11 | No Flake
🎨 Kiat Pro: Warna yang lebih terang membuat garasi kecil terasa lebih besar. Lantai yang gelap menyembunyikan kotoran namun memperlihatkan debu. Serpihan menambah tekstur dan menyembunyikan ketidaksempurnaan kecil.
Apa Saja yang Ada di Dalam Kit Lantai Garasi Lapisan Epoksi DIY Anda?
Kami tidak mengambil jalan pintas. Setiap kit sudah termasuk:
Semua Kit Termasuk:
(1) Primer Epoksi (penting untuk ikatan yang kuat)
(1) Epoksi Padat Tinggi dalam Warna Anda
(2) Penutup Rol Tidur 9 ″ x 3/8 ″
(1) Rangka Rol
(2) Sepasang Sarung Tangan Vinyl
(1) Pengaduk Galon
(2) Sikat Chip 3″
(1) Ember Plastik 6 Galon
Kit Dengan Flake & Topcoat Add:
2,5-5 pon serpihan dekoratif (atau 40-80 kg untuk Siaran Penuh)
1-2 Lapisan Atas Uretan Alifatik (untuk ketahanan terhadap bahan kimia UV +)
Mengapa Epoksi Padat Tinggi Kami Mengungguli yang Lain
✅ Tubuh yang lebih tebal = Umur yang lebih panjang
Kami resin epoksi adalah padatan 100%-tidak seperti merek-merek DIY yang diencerkan. Hasilnya? Lapisan yang lebih tebal dan dapat meratakan sendiri yang tahan terhadap ban panas, abrasi, dan benturan.
✅ Termasuk Primer = Tidak Ada Kegagalan
Lewati primer dan berisiko menimbulkan gelembung, pengelupasan, atau kerusakan. Kami menyertakannya dalam setiap kit-karena lantai impian Anda tidak akan terangkat setelah satu musim.
✅ Mantel Atas Sangat Disarankan
A lapisan atas uretan bukanlah pilihan-ini sangat penting. Mencegah penguningan, meningkatkan ketahanan terhadap bahan kimia, dan membuat pembersihan tumpahan menjadi mudah dilakukan.
Tahan terhadap bahan kimia: Dibangun untuk Garasi Nyata
Kami Lantai berlapis atas TL356 tahan terhadap tumpahan garasi yang umum terjadi:
| Bahan kimia | Peringkat Resistensi |
|---|---|
| Bensin | E (Perendaman Jangka Panjang) |
| Oli Motor | E (Perendaman Jangka Panjang) |
| Asam Sulfat 10% | D (Perendaman 72 Jam) |
| Xylene | E (Perendaman Jangka Panjang) |
Kunci Peringkat:
A = Tidak Disarankan → E = Perendaman Jangka Panjang
🧪 Minyak rem tumpah? Jangan panik. Dengan topcoat kami, Anda memiliki waktu berjam-jam untuk membersihkannya-bukan hitungan detik.
Cara Memasang Lantai Epoxy Garasi Anda dalam 3 Langkah
Langkah 1: Persiapan Permukaan (Etsa atau Giling)
Opsi A (Mudah): Eco-Etch 1001 - tanpa gerinda, tanpa asam.
Opsi B (Pro): Penggerindaan berlian untuk daya rekat yang optimal.
🛑 Peringatan: Epoksi gagal pada beton yang tidak dipersiapkan dengan baik. Jangan lewatkan ini.
Langkah 2: Aplikasikan Primer + Epoksi
Perdana → Tunggu 7-10 jam
Terapkan epoksi → Tunggu 8-12 jam
Serpihan siaran (jika menggunakan) saat epoksi basah
Langkah 3: Lapisan atas untuk Perlindungan
Aplikasikan lapisan atas uretan → Tunggu 24 jam untuk penggunaan ringan, 7 hari untuk penggunaan penuh
Apa yang Masih Anda Butuhkan
Diperlukan: Respirator NIOSH, selotip pelukis, bahan persiapan (etsa atau gerinda)
Direkomendasikan: Penutup sepatu, xylene/spirit mineral untuk membersihkan, pakaian lama
Padatan Tinggi vs Padatan 100%: Kebenaran
Banyak merek yang memasarkan "padatan 100%" sebagai cawan suci. Benarkah? Epoksi padatan 100% murni terkenal sulit diterapkan oleh para DIYer. Milik kita adalah Padatan 93% menurut beratnya-titik temu antara ketebalan, daya tahan, dan kemudahan penggunaan.
🧩 Anggap saja seperti ini: Lebih tebal tidak selalu lebih baik jika Anda tidak bisa meratakannya. Formula kami meratakan dengan sendirinya dengan indah-tanpa hitungan mundur yang membuat frustrasi.
Jangan Hanya Percaya Kata-kata Kami
Kami telah menyediakan bernilai jutaan dolar sistem epoksi untuk pemilik rumah dan profesional. Kit ini adalah hasil penyulingan dari semua yang telah kami pelajari: primer yang tepat, viskositas epoksi yang ideal, lapisan atas yang paling tahan lama-semuanya dalam satu kotak.
Pertanyaan yang Sering Diajukan
"Dapatkah saya melewatkan lapisan atas?"
Anda bisa melakukannya-tetapi kami tidak merekomendasikannya. Lapisan atas adalah pelindung lantai Anda dari sinar UV, ban, dan bahan kimia. Kami menawarkan versi tanpa lapisan atas hanya untuk kepatuhan California atau aplikasi khusus.
"Berapa lama waktu yang dibutuhkan untuk pemasangan?"
Sisihkan waktu di akhir pekan. Persiapkan hari pertama, lapisi hari kedua. Suhu sangat penting-targetkan suhu 70°F.
"Bagaimana dengan biaya lantai garasi epoksi?"
Kit kami berkisar dari $491.99 hingga $1,990.99tergantung pada ukuran dan inklusi. Bandingkan dengan $3,000-$5,000 untuk instalasi pro.
Siap Mengubah Garasi Anda?
Lantai garasi impian Anda hanya dengan sekali klik. Pilih opsi Anda di bawah ini.
👉 Pilih Ukuran Kit:
[250 meter persegi (tanpa serpihan)] [500 meter persegi (tanpa serpihan)]
[250 meter persegi dengan lapisan atas] [500 meter persegi dengan lapisan atas]
[Siaran Penuh 250 Meter Persegi] [Siaran Penuh 500 Meter Persegi]
👉 Pilih Warna Dasar: [18 Warna]
👉 Pilih Serpihan: [11 Campuran + "Tanpa Serpihan"]
📞 Butuh Bantuan? Hubungi ahli lantai garasi kami di 13389048568. Kami akan memandu Anda untuk mendapatkan perlengkapan yang sempurna untuk proyek Anda.