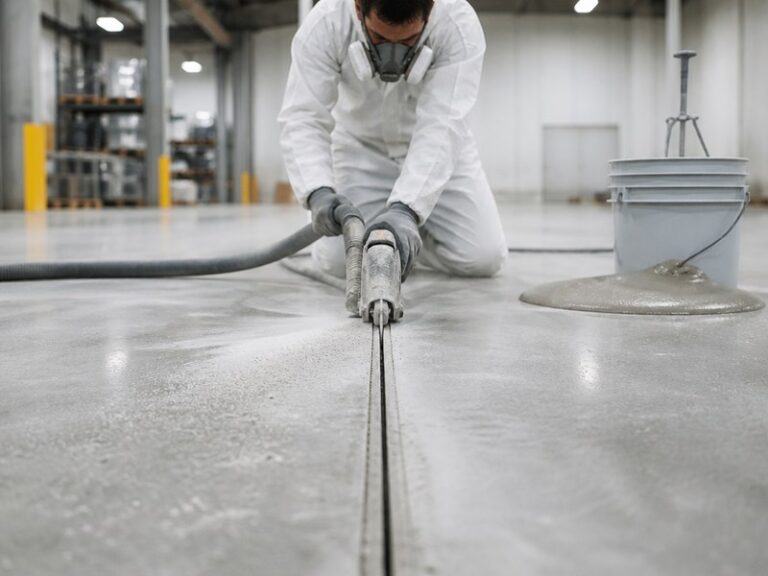
Urethane cement flooring joint preparation is the process of cleaning, repairing, and filling every expansion joint, control joint, construction joint, and crack in a concrete slab before a self-leveling urethane cement system such as ProKrete SL is poured. Short answer: the ProKrete SL Method completes it in six steps: classify, chase, repair, set backer rod (expansion joints only), fill with urethane cement joint filler, then prime and pour. Joint preparation decides whether a urethane cement floor lasts 15 years or fails in the first 18 months; skipping it is the single most common cause of cracked and spalled resinous floors. This guide covers why joints fail under rigid toppings, how to prepare each joint type, the tools and working times, and a pre-pour checklist for food plants, commercial kitchens, cold storage, and warehouses.
What Is Urethane Cement Flooring Joint Preparation, and Why Does It Matter?
Urethane cement is a polyurethane resin-modified cementitious flooring system, a rigid topping that combines the chemical resistance of polymer resins with the thermal compatibility of cement. It is a different material family from flexible polyurethane sealants, and that distinction drives every joint decision in this guide. Concrete joints are planned weak points that let a slab shrink, curl, and move without cracking randomly. ACI 302.1R-15, the American Concrete Institute guide for concrete floors, recognizes three primary joint types in slabs-on-ground: isolation joints, contraction (control) joints, and construction joints.
A resinous floor cannot simply bridge these joints. Urethane cement is a rigid topping with a compressive strength around 9,500 psi; when the slab moves underneath it, a bridged joint concentrates that movement into a single line and the topping cracks there. Industry failure data points to the same conclusion: the leading causes of joint failure in coated floors are missing or shallow filler, incompressible debris trapped in the joint, water intrusion, and hard-wheeled traffic hammering unsupported edges. ACI guidance identifies hard-wheel traffic as the primary driver of spalling at joint edges. Joint preparation is not cosmetic work: it is the difference between a floor that performs for its full service life and one that fails within two years.
Urethane cement flooring joint preparation also protects the slab itself. An open joint collects food debris, washdown water, and cleaning chemicals; in a food plant that is a sanitation risk, and in any facility it accelerates edge deterioration. Filled joints eliminate debris traps, support edges under forklift wheels, and give the seamless urethane cement surface the uniform support it needs to perform as designed.
Which Joints Need Preparation Before Urethane Cement Flooring?
Not every joint is treated the same way. The ProKrete SL Method treats each joint type differently because each one moves differently. Get the classification wrong and the treatment will fail, no matter how carefully it is executed.
| Joint Type | What It Does | How the ProKrete SL Method Treats It |
|---|---|---|
| Contraction (control) joint, sawcut | Manages shrinkage cracking in the slab | Chase to clean edges, fill full depth with semi-rigid urethane cement filler. No backer rod. |
| Construction (cold) joint | Marks where two concrete placements meet | Clean and fill with urethane cement; use a flexible polyurethane sealant only if the joint must move. |
| Expansion (isolation) joint | Allows full-depth movement between slab and column, wall, or equipment | Install backer rod at depth, then cap with a cementitious joint sealant. The joint must stay functional. |
| Random crack | Uncontrolled movement or shrinkage | Rout and fill with urethane cement if dormant; saw and seal if actively moving. |
| Spalled joint edge | Broken, chipped concrete at the joint line | Rebuild shoulders wider than 1 in., re-saw, then fill (re-nosing: rebuilding the shoulder wider than the original cut before re-sawing). |
ACI 302.1R-15 recommends semi-rigid filler for contraction and construction joints exposed to hard-wheeled material-handling traffic, and flexible elastomeric sealant for joints that must accommodate movement. ASTM C920 covers cold-applied elastomeric joint sealants for building and vehicular surfaces. These two rules shape everything that follows in the method.
Why the ProKrete SL Method Fills Joints With Urethane Cement, Not Epoxy or Caulk
Three material families can fill a concrete joint under a resinous floor: epoxy, flexible polyurethane sealant, and urethane cement (also called cementitious urethane). The ProKrete SL Method fills joints with urethane cement, not epoxy or caulk, for three measurable reasons: monolithic bond, thermal compatibility, and edge support.
First, bond and chemistry. Joints are filled with the same three-component system (resin, hardener, aggregate) that forms the floor body. The joint filler and the topping cure as one continuous material with no interface, so there is no weak line for moisture, chemicals, or wheel impact to attack. In KAIDA’s installation training program, we have watched mixed-chemistry joints fail repeatedly across dozens of sites: the interface between an epoxy patch and a urethane cement floor is where delamination starts.
Second, thermal compatibility. Urethane cement has a coefficient of thermal expansion close to concrete, around 1.1 x 10^-5 in./in./degF in ProKrete SL technical data. Epoxy resins expand and contract more than concrete. Under the thermal shock of hot water washdowns or 250 degF equipment cleaning cycles, an epoxy-filled joint can debond or crack where a cementitious filler stays intact. ProKrete’s published data shows its system surviving 40 thermal cycles from 400 degF hot oil to 25 degF ice water with no effect. The benefits, uses, cost, and installation thickness of urethane cement systems are covered in our complete guide to urethane cement flooring.
Third, edge support. ACI guidance is explicit: joints under hard-wheeled traffic need semi-rigid filler that supports the edges, not soft caulk. ProKrete SL develops a compressive strength of 9,500 psi (ASTM C-579), a tensile strength of 1,500 psi (ASTM C-307), and pull-off adhesion over 400 psi with substrate failure first (ASTM D-4541). Flexible sealants seal water, but they do not carry forklift loads. The material comparison below summarizes where each family belongs.
| Filler Material | Edge Support | Тепловой шок | Best Use in a Urethane Cement Project |
|---|---|---|---|
| Epoxy joint filler | Strong, rigid | Moderate; higher thermal expansion than concrete | Structural repairs below the topping; not the joint fill |
| Polyurea joint filler | Strong, fast cure | Хорошо | Quick-turn repairs when downtime is hours, not days |
| Flexible polyurethane sealant (ASTM C920) | None | Превосходно | Expansion joints and saw-and-seal joints only |
| Urethane cement filler (ProKrete SL) | Strong, monolithic | Excellent; same chemistry as the floor | All static joints, filled flush with the topping |
The one place a flexible material is required is the moving expansion joint, where a backer rod and a thin cementitious sealant cap are used rather than a rigid monolithic fill.
The ProKrete SL Method: Six Steps of Joint Preparation
The ProKrete SL Method is a repeatable sequence designed for self-leveling urethane cement installations. It takes a crew through every joint in the bay before the first bucket of SL is mixed, and it is the sequence we train and audit on every KAIDA urethane cement project.
Step 1. Inspect and Classify Every Joint
Walk the slab and map every joint before any tool starts. Identify the joint type, measure spall width and depth, check vertical displacement between panels, and look for water stains or chemical residue. Tap the concrete along each edge; a sharp metallic ring means sound concrete, while a dull or hollow sound indicates delamination below the surface. Sounding takes minutes and tells you whether the repair is surface-deep or needs to go deeper.
Step 2. Chase and Clean the Joint
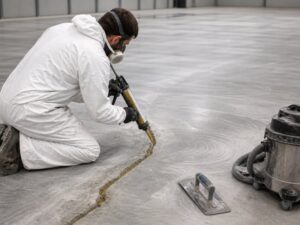
Chase (cut a clean, uniform channel in) each joint with a diamond blade joint chaser or saw. A minimum width of 1/4 in. is a practical working target for sawcut control joints. Remove old filler, loose concrete, curing membrane, and all debris with an industrial vacuum. The joint must be dry and free of oil, grease, and laitance before any filler goes in. Incompressible debris left in a joint is a documented cause of spalling, because it locks the joint and forces stress into the edges.
Step 3. Repair Spalled Edges Before Filling
Broken joint edges must be rebuilt before the joint is filled, or the filler will simply fall out of the damage. As a field rule, spall repair follows three width bands:
- Under 1/2 in.: sawcut and fill with urethane cement joint filler.
- 1/2 in. to 1 in.: re-saw to sound concrete, rebuild the shoulder with a structural repair mortar, then fill.
- Wider than 1 in.: rebuild the shoulder wider than the original cut, re-saw, then fill (re-nosing).
If one panel sits lower than the other by more than 1/4 in., the level change is both a wheel-impact hazard and a compliance issue: ADA 303 allows only 1/4 in. vertical change on accessible routes and requires beveling between 1/4 and 1/2 in.
Step 4. Install Backer Rod in Expansion Joints Only
Expansion joints are full-depth movement joints. They are the one place the method uses a compressible closed-cell polyethylene backer rod. The rod sits at depth in the joint and controls the thickness of the sealant cap above it, typically keeping a width-to-depth ratio near 2:1 so the sealant can stretch instead of tearing. ProKrete’s published expansion joint detail shows backer rod combined with a cementitious joint sealant cap formed by the urethane cement system, detailed around a standard 1/4 in. x 1/4 in. keyway.
Use backer rod in expansion joints only. Control joints filled with semi-rigid urethane cement filler sit directly on concrete: the filler needs full-depth support to resist wheel loads, and a compressible rod removes that support so the filler punches down under the first forklift pass. This is the most common confusion we correct on site, because DIY guidance on the internet recommends backer rod everywhere.
Step 5. Fill Every Joint With Urethane Cement Joint Filler
Mix ProKrete SL at its standard ratio of one unit of resin, one unit of hardener, and one bag of aggregate. Add the colorant to the resin before the hardener, mix for one minute with a Jiffy-style blade, and pour the full bucket onto the floor immediately; material left in the bucket exotherms and shortens working time. Work the material into each joint with a trowel or squeegee and strike it flush with the floor surface. The published coverage for one ProKrete SL kit is 60 sq ft at 1/8 in. and 100 sq ft at 1/16 in. As a worked example, one kit fills roughly 480 linear feet of a 1/4 in. x 3/4 in. sawcut joint, far more than most bays contain, so joint filling rarely drives the material budget.
Step 6. Prime, Pour, and Respect the Working Times
ProKrete SL requires a primer when it is used as a stand-alone system. Apply the primer to the prepared substrate, including the filled joints, and follow the manufacturer’s recoat window. Then pour the SL body: the system has a pot life of about 20 minutes at 70 degF and a tack-free time of about 10 hours, so batch sizes and crew positions are planned before mixing starts. ProKrete SL is moisture tolerant up to 99% internal relative humidity (ASTM F2170) or 25 lbs per 1,000 sq ft per 24 hours (ASTM F1869), which means joint preparation and pouring can proceed on slabs that would stop an epoxy installation.
The same joint preparation sequence ships with every KAIDA self-leveling urethane cement system, including the documented joint preparation specification and recoat windows.
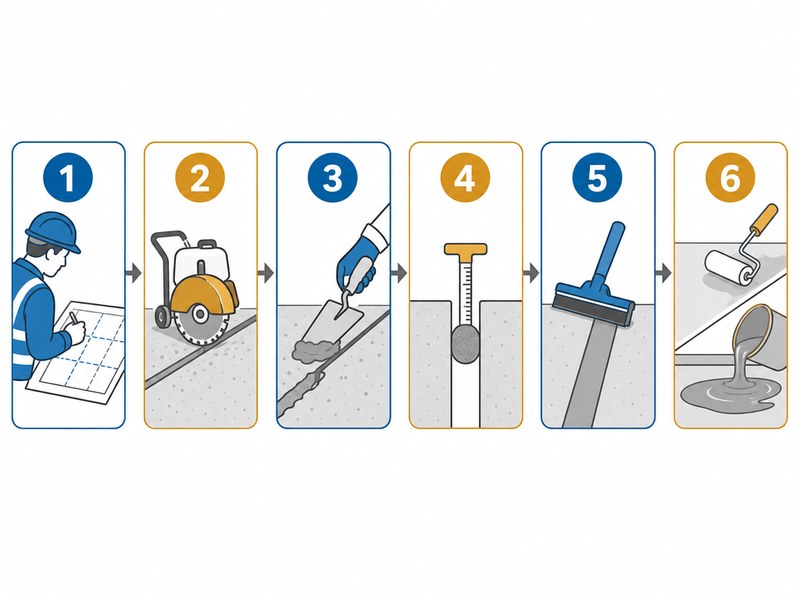
 Figure 1. The six-step ProKrete SL Method sequence for urethane cement flooring joint preparation.
How to Prepare Expansion Joints for Urethane Cement Flooring
The expansion joint is the one joint that must never be bridged with a rigid fill. It exists to absorb movement between the slab and columns, walls, equipment bases, and adjoining pours. When rigid urethane cement crosses the gap, the next thermal cycle puts the full movement into a single line and the topping cracks, usually in a jagged path that splinters away from the joint line.
The correct expansion joint preparation for urethane cement flooring follows the ProKrete detail: clean the joint full depth, seat a closed-cell backer rod at the required depth, and cap it with a thin layer of cementitious joint sealant (the urethane cement system itself). For joints exposed to standing water or exterior conditions, verify that the concrete joint sealant selected above the rod is rated for immersion before installation. The joint remains a working joint; the cap keeps the surface seamless, cleanable, and flush for traffic, while the rod lets the slab move underneath.
The filler must stay flexible at the operating temperature. An expansion joint filler that hardens in a freezer or hot process area will tear instead of flex, so match the sealant’s temperature rating to the facility’s actual operating range. This expansion joint filler strategy is the difference between a floor that stays seamless and one that cracks on the first hot washdown.
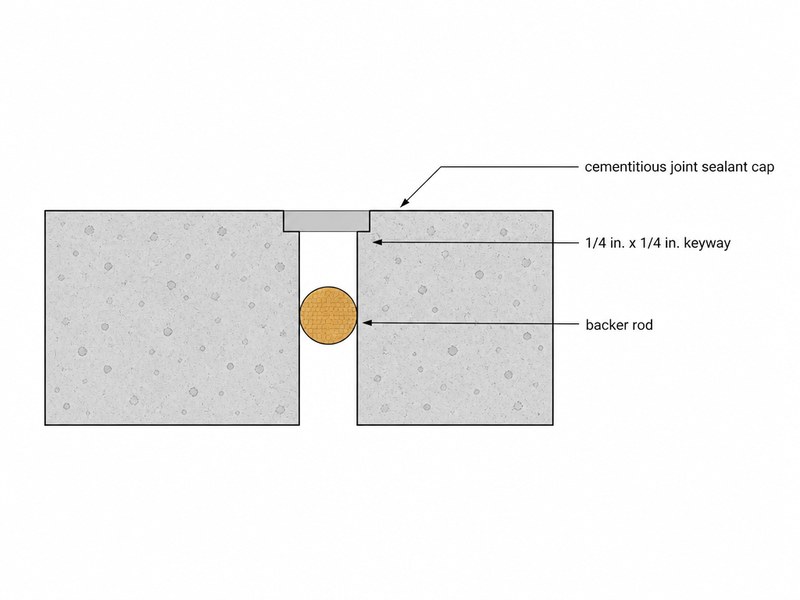
Figure 2. Expansion joint detail: backer rod at depth with a cementitious joint sealant cap of urethane cement.
Where an existing joint has been coated over in a previous system, the saw-and-seal practice is an accepted alternative: after the new urethane cement surface cures, cut a fresh 1/4 in. joint over the original joint line and fill it with a flexible polyurethane concrete joint sealant meeting ASTM C920. Food plants use this technique routinely so the overlay stays monolithic during installation but still moves with the slab afterward. Note that this is a post-pour operation, not a replacement for pre-pour joint preparation.
How to Prepare Control Joints and Sawcuts for Urethane Cement
Control joints are sawcuts placed after the pour to manage shrinkage cracking. Under forklift and pallet jack traffic they are the most common source of edge damage in industrial floors, which is why they get the opposite treatment from expansion joints: full-depth, semi-rigid fill with no backer rod.
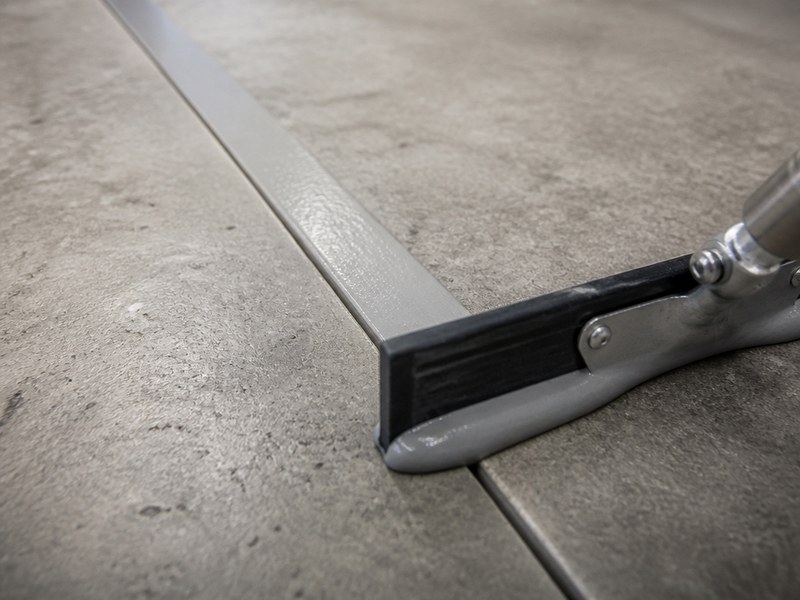
Chase the sawcut to clean edges, vacuum it, and fill it flush with the same urethane cement joint filler used everywhere else. The control joint filler spec is simple: semi-rigid, full depth, flush finish, no backer rod. Overfilled filler is shaved flush after cure so wheels do not impact the joint line. If the slab is new, defer joint filling 60 to 90 days after the pour so shrinkage and joint opening happen before the filler is placed; filling too early is a documented cause of filler separation that looks like product failure but is actually normal slab movement.
A properly installed control joint filler also protects the sawcut walls from chemical attack during washdown. Compliance matters here too. OSHA 1910.22 requires walking-working surfaces to be kept free of hazards, and a damaged joint that creates a trip point is a cited violation; the maximum penalty for willful or repeated violations rose to $165,514 in January 2026. Flush, maintained control joints are an operations issue, not just an appearance issue.
How to Prepare Joints Around Drains, Floor Sinks, and Pipe Penetrations
Joints around drains, floor sinks, and pipe penetrations behave like expansion joints: the concrete moves against the embedded item, so a rigid fill cracks on the first thermal cycle. The same joint preparation rules apply here with one addition: verify what surrounds the penetration before you choose the filler.
Prepare them by cleaning the gap full depth, seating backer rod where the gap exceeds 1/4 in., and capping with a flexible polyurethane joint sealant meeting ASTM C920, the same rule that governs wall and column expansion joints. In food plants, verify the sealant is rated for immersion and daily chemical washdown before installation. This detail is frequently missed on drawings, and it is a common sanitation failure point in process areas.
Where a drain or floor sink has a metal frame, treat the metal-to-concrete interface separately from the slab joint: clean the frame perimeter, apply the drain manufacturer’s recommended primer, and cap with the same ASTM C920 flexible sealant. Around pipe penetrations, seat backer rod in gaps wider than 1/4 in. and tool a flexible sealant bead against the pipe so the penetration stays watertight while the slab moves.
How to Treat Perimeter Joints at Wall Bases
Perimeter joints where the floor meets walls, columns, and door frames are movement joints and follow the expansion joint rule: clean, backer rod, flexible cap. A rigid fill at the perimeter transfers slab movement into the topping and causes edge cracking along the wall line.
If the perimeter gap is left open for the topping to self-terminate, clean and seal it after the pour with a flexible sealant so debris and washdown water cannot enter. In cold storage rooms, perimeter insulation joints deserve the same backer rod and flexible cap treatment as expansion joints. These termination details are part of the documented joint preparation specification that ships with every KAIDA system.
Where the floor meets a wall that will receive a cove base or curb, install the termination joint before the topping: a flexible sealant-filled joint at the floor-to-wall intersection stops washdown water from migrating under the topping edge. At door frames and roll-up door sills, the joint follows the same expansion joint rule, and the sealant must be rated for wheel traffic where forklifts cross the sill.
Moisture, Temperature, and Substrate Conditions for Joint Preparation
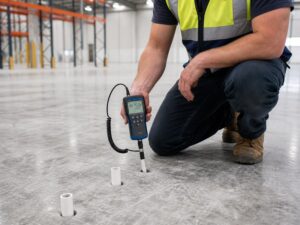
Urethane cement is the most moisture-tolerant resinous flooring family, but joint preparation still happens on a substrate that must be structurally sound, mechanically profiled, clean, and dry of surface water. ProKrete’s published guidance calls for mechanical profiling of the substrate, and it accepts internal moisture up to 99% RH (ASTM F2170) or 25 lbs per 1,000 sq ft per 24 hours (ASTM F1869). In practical terms, an SL installation can proceed on a slab that would fail an epoxy floor, but the joint cavities themselves must be dry: standing water in a joint prevents filler adhesion and will show up as a white, unbonded line after cure.
Temperature rules for joint preparation and pour: the recommended range is 50-90 degF. The minimum applicable temperature is 36 degF, which allows winter work in refrigerated and unheated facilities. Below 50 degF, plan longer cure times; above 90 degF, reduce batch sizes to stay inside the 20-minute pot life.
Humidity must stay below 95%, and the floor must be at least 5 degF above the dew point to prevent condensation in the joints. Like every other stage of urethane cement flooring joint preparation, moisture control is a matter of sequence: cavities dry first, filler second, primer third.
New concrete can be coated at 5 days of age with this system, which is unusually early for a resinous topping. System-level moisture tolerance and service temperature limits are detailed in our urethane cement flooring guide.
Joint Preparation Tools, Materials, and Working Times
| Tool or Material | Role in Urethane Cement Flooring Joint Preparation |
|---|---|
| Diamond blade joint chaser or saw | Cuts joints to clean, uniform edges |
| Industrial vacuum | Removes debris, old filler, and dust from the joint |
| Sounding hammer or chain | Detects delamination along joint edges |
| Closed-cell polyethylene backer rod | Controls sealant depth in expansion joints only |
| Urethane cement joint filler (ProKrete SL) | Semi-rigid fill for control, construction, and crack joints |
| SL primer | Required bonding layer when SL is installed stand-alone |
| Trowel, squeegee, Jiffy-style mixer | Applies and strikes off the joint filler |
| SL body coat | The floor topping poured after joint preparation |
Working times at 70 degF, from published ProKrete data: 20 minutes of pot life for SL, 20 minutes of working time, 10 hours to tack-free cure, and at least one week before mechanical cleaning. Crew size and bay layout are planned around these numbers: a batch that cannot be placed within 20 minutes is a batch that stays in the bucket and exotherms.
Joint Preparation Cost and Coverage
Joint preparation cost is driven by labor and repair scope, not material. The material math is small: one ProKrete SL kit covers 60 sq ft at 1/8 in. or 100 sq ft at 1/16 in., and joint filling uses a fraction of a kit in most bays (about 480 linear feet of a 1/4 in. x 3/4 in. joint per kit). The real cost variables are joint condition: chasing and vacuuming a sound sawcut is cheap; rebuilding spalled shoulders, stabilizing rocking panels, or full-depth repair is expensive and should be priced before the coating budget is locked.
Published 2026 industry comparisons give useful planning ranges for the repair side: semi-rigid polyurea filler takes 30 to 60 minutes of downtime and lasts 5 to 10 years; semi-rigid epoxy takes 8 to 12 hours and lasts 7 to 12 years; flexible concrete joint sealant takes 2 to 4 hours and lasts 3 to 5 years; full-depth repair takes 24 to 48 hours and lasts 20 years or more. For urethane cement installations, the joint filler shares the floor’s chemistry and service life, which is why the ProKrete SL Method bonds the two into one system instead of mixing maintenance cycles. In a global floor coatings market projected to grow from 3.7billionin2025to3.7billionin2025to6.3 billion by 2033 (Grand View Research floor coatings market report), joint preparation is where that investment is protected or wasted.
Common Joint Preparation Mistakes That Crack Urethane Cement Floors
The following mistakes appear in nearly every failed floor we audit, and each one traces back to a break in urethane cement flooring joint preparation.
- Bridging expansion joints with rigid fill instead of a flexible expansion joint filler. The most expensive mistake. The joint cracks through the topping, and the repair requires sawing, refilling, and re-pouring.
- Installing backer rod under control joint filler. Removes the support base the filler needs, which then punches down under wheel loads.
- Filling joints on a new slab too early. Slab shrinkage separates the filler from the joint walls within months.
- Leaving incompressible debris in the joint. Locks the joint, concentrates stress, and spalls the edges.
- Filling over wet joints. The filler never bonds, and the failure appears as a white unbonded line after cure.
- Mixing chemistries between filler and floor. Epoxy patches under urethane cement create an interface that moisture and chemicals attack; delamination starts exactly there.
- Ignoring rocking panels and voids. Filler and patches shear out of joints that move vertically; stabilization comes before joint preparation, not after.
Urethane Cement Flooring Joint Preparation: Pre-Pour Checklist
Before you fill
- Map and classify every joint and crack in the bay
- Sound the edges; mark delamination and rocking panels
- Chase joints to clean edges, minimum 1/4 in. wide
- Vacuum joints and remove all debris, oil, and laitance
- Rebuild spalls wider than 1 in.; re-saw and clean
- Confirm no level change exceeds 1/4 in. (ADA 303)
- Install backer rod in expansion joints only
Before you pour
- Fill all joints flush with urethane cement joint filler
- Shave overfilled joints after cure
- Confirm substrate profile, moisture (ASTM F2170), and temperature before priming
- Prime, then pour SL within the recoat window; plan batches around the 20-minute pot life
- Protect the floor from traffic for the full cure time
After the pour, return within 90 days to inspect the joint lines and the coating interface. This follow-up is part of the documented joint preparation specification: a joint that opens or spills in the first quarter signals a condition worth correcting before it becomes a warranty claim.
Send us your joint layout. Floor area, joint photos, and moisture readings are enough for our engineers to return a joint preparation plan and coverage estimate within 24 hours. Request a free joint preparation spec review.
Urethane Cement Joint Preparation Decision Matrix: Joint Type, Filler, and Backer Rod
This urethane cement flooring joint preparation decision matrix summarizes the rules covered above into one reference table. It answers the three questions that decide every joint treatment: what the joint does, what goes into it, and when.
| Joint Type | Prep Action | Filler Material | Backer Rod? | Timing |
|---|---|---|---|---|
| Contraction (control), sawcut | Chase, vacuum | Semi-rigid urethane cement filler | Нет | 60-90 days after pour on new slabs |
| Construction (cold) | Clean, fill | Urethane cement; flexible PU sealant if moving | Нет | Before pour |
| Expansion (isolation) | Clean full depth, seat rod, cap | Urethane cement cap | Да | Before pour |
| Random crack, dormant | Rout, fill | Urethane cement | Нет | Before pour |
| Random crack, active | Saw-and-seal | Flexible PU sealant (ASTM C920) | Да | Post-pour |
| Spalled edge | Rebuild shoulder, re-saw, fill | Structural repair mortar + urethane cement | Нет | Before pour |
Frequently Asked Questions About Urethane Cement Flooring Joint Preparation
Can you pour urethane cement over expansion joints?
No. A rigid topping bridging a moving expansion joint will crack at the joint line. The ProKrete SL Method installs a backer rod at depth and caps the joint with the urethane cement material itself so the joint keeps moving and the surface stays seamless.
Do control joints need backer rod?
No. Control joints filled with semi-rigid urethane cement filler need full-depth support from the concrete below. The control joint filler must sit on concrete, not on foam; a compressible backer rod removes that support, and the filler punches down under wheel loads.
When should joints be filled on a new slab?
Defer joint filling 60 to 90 days after the pour so shrinkage and joint opening happen first. Filling too early causes separation that is often mistaken for product failure.
How long after joint filling before the SL pour?
Follow the primer recoat window for the body coat. At 70 degF, ProKrete SL reaches tack-free in about 10 hours; joints filled with the same material cure in parallel with the system, so sequencing is driven by the primer, not the joint filler.
Does the joint filler have to match the floor chemistry?
Yes, and this is a core reason the ProKrete SL Method works. The filler and topping share the same resin, hardener, and aggregate system, so bond, thermal movement, and cure are identical. Mixed chemistries introduce an interface that moisture and chemicals can attack.
Can joint preparation be skipped if the floor will be poured anyway?
No. Skipping joint preparation is the leading documented cause of premature resinous floor failure. The only accepted alternative is saw-and-seal, and it still requires cutting and filling joints after the pour.
What is the difference between joint preparation and joint treatment in urethane cement flooring?
Joint preparation is the physical work: inspecting, chasing, cleaning, repairing spalls, and setting backer rod. Joint treatment is the material decision: what goes into the joint and how it is detailed. The ProKrete SL Method combines both into one documented sequence.
Do expansion joints in cold storage or freezers need different preparation?
Yes, two adjustments apply. First, the joint sealant cap must stay flexible at the operating temperature; a cap that hardens in a freezer tears instead of flexes. Second, ProKrete SL can be applied down to 36 degF, so joint preparation and pouring can proceed in refrigerated or unheated facilities where epoxy systems stop, provided the joint cavities are dry and the floor is at least 5 degF above the dew point.
Can you pour urethane cement over joints that were coated over in a previous system?
Only with preparation. Use the saw-and-seal practice: after the new urethane cement surface cures, cut a fresh 1/4 in. joint over the original joint line and fill it with a flexible polyurethane concrete joint sealant meeting ASTM C920. This is a post-pour operation, not a replacement for pre-pour joint preparation.
Does this joint preparation method work for other urethane cement systems?
The sequence transfers to trowel-applied and broadcast urethane cement systems with two adjustments. First, ProKrete HD (trowel-applied) and RT (broadcast) systems are self-priming, so the primer step in Step 6 (Prime, Pour, and Respect the Working Times) is omitted. Second, broadcast systems may omit the smooth flush joint fill in favor of a broadcast profile. Joint classification, the backer rod rule, and the filling chemistry stay the same.
How long does urethane cement joint preparation take?
Joint preparation time is driven by joint count and condition, not by floor area. Sound sawcut joints need only chase, vacuum, and fill; spalled or rocking joints add repair time that can dominate the schedule. Material time is small: one ProKrete SL kit fills roughly 480 linear feet of a 1/4 in. x 3/4 in. sawcut joint, so joint filling rarely drives the material budget. Send us your joint layout and we will return a preparation plan with realistic scheduling.


 English
 Spanish
 Portuguese
 Arabic
 French
 Italian
 Russian
 Indonesian
 Swedish